
Red Velvet Cake Pops: 20 Irresistible and Easy Bites
You are going to absolutely love the vibrant color and the super rich flavor of these little bite-sized treats. I still remember the first time I whipped these up for a family party and they were gone in literally minutes. Red velvet is just so special because it has that tiny hint of cocoa and a tangy finish that makes your taste buds happy. This recipe is going to walk you through making a moist cake base, mixing it with the creamiest frosting, and dipping everything into a silky smooth coating. You really dont need any fancy professional skills to get a result that looks like it came straight from a bakery. Lets just jump right into making these amazing treats in your own kitchen.
Why You Will Love These Red Velvet Cake Pops
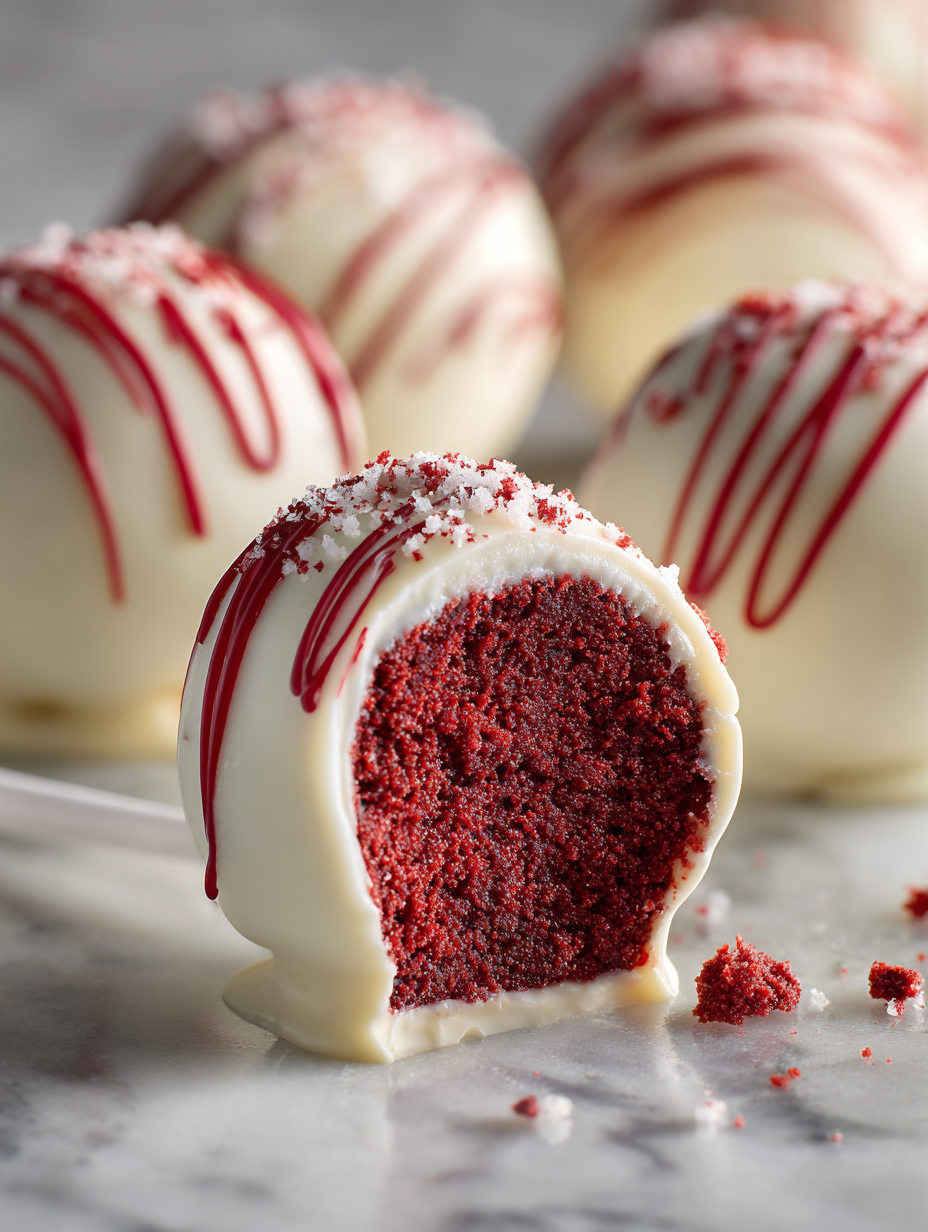
Honestly, these are a total sensory explosion. When you bite through that crisp white coating and hit the super moist, deep red cake inside, it is just pure magic. The contrast between the bright white and the velvety red looks so fancy, but they are actually really fun to make. Plus, they are the perfect size for snacking without feeling like you overdid it. They are always the star of the dessert table because they look so polished and professional.
Ingredients Needed for Red Velvet Cake Pops
Here is everything you need to grab from the store to get started on these beauties. I like to have everything measured out before I start so I dont get overwhelmed.
- 2 cups all-purpose flour
- 1 teaspoon baking soda
- 1 teaspoon cocoa powder
- 1.5 cups granulated sugar
- 1 cup buttermilk
- 2 large eggs
- 1 cup vegetable oil
- 1 teaspoon white vinegar
- Red food coloring
- 8 ounces cream cheese, softened
- 1/2 cup butter, softened
- 2 cups powdered sugar
- 24 ounces white chocolate or candy melts
- Cake pop sticks
How to Make Red Velvet Cake Pops from Scratch
Making these from scratch is so much better than using a box mix. You get that authentic flavor and the texture is just unbeatable. Just remember to give yourself enough time because the cooling and chilling steps are super important.
Baking the Base
First things first, go ahead and preheat your oven to 350 degrees. You want to mix your dry ingredients in one big bowl and your wet ingredients in another. Once you combine them, whisk it all until it is nice and smooth. Pour that beautiful red batter into a pan and bake it for about 30 minutes. You have to make sure it is fully cooked, so stick a toothpick in the middle to see if it comes out clean. Now, here is the hard part: you must let the cake cool down completely. If you try to work with it while it is warm, you will end up with a mushy mess.
Forming the Red Velvet Cake Pops
Once your cake is totally cool, it is time to get your hands a little messy. Crumble the whole cake into tiny fine pieces in a large bowl. In a separate bowl, beat together your cream cheese, butter, and powdered sugar to make a silky frosting. Now, start adding that frosting to your cake crumbs. You want to mix it until you can squeeze a handful and it stays in a solid ball. It should feel like damp sand. If it is too sticky, you added too much frosting, so go slow.
Dipping and Chilling
Roll the mixture into small, even balls and put them on a tray. You need to pop these in the freezer for at least 30 minutes. This is a huge secret because if the cake balls are warm, they will just slide right off the sticks when you try to dip them. Melt your white chocolate carefully. Dip the tip of a cake pop stick into the melted chocolate, then poke it into a cake ball. This acts like glue. Finally, dunk the whole ball into the coating and let the extra drip off.
Pro Tips for Perfect Red Velvet Cake Pops
I have made plenty of mistakes so you dont have to. Here are my top tips for making sure yours turn out looking like they belong in a magazine.
- Use a Styrofoam block to hold the sticks upright while the coating sets so they stay perfectly round.
- Do not overheat your chocolate or it will get thick and clumpy and impossible to work with.
- Keep the cake balls in the fridge and only take out a few at a time to dip so they stay cold.
Storing Your Red Velvet Cake Pops
If you actually have any leftovers, you can keep them in the refrigerator in an airtight container for up to a week. They stay nice and moist in there. If you want to save them for much later, you can even freeze them. Just make sure the coating is fully set before you pack them away so they dont stick together.
Frequently Asked Questions
I know a few things might go wrong the first time, so here are some answers to things I usually get asked.
Why did my cake pops fall off the sticks?
This is usually because the cake balls were too heavy or the chocolate coating was too warm. Make sure you are chilling the balls long enough and that you arent using too much frosting in your mix. That little dab of chocolate on the stick before you put it in the ball really helps too.
Can I make these in advance?
You definitely can. You can make the cake and roll the balls a whole day early and just keep them in the fridge. Then, you just have to do the dipping on the day you want to serve them so they look fresh and shiny.
Nutritional Information
Here is a quick look at the estimated nutrition for one cake pop. Keep in mind these are treats, so enjoy every bite.
- Calories: 180 kcal
- Total Fat: 9g
- Saturated Fat: 5g
- Cholesterol: 15mg
- Sodium: 110mg
- Total Carbohydrates: 24g
- Sugars: 18g
- Protein: 2g
Red Velvet Cake Pops: 20 Irresistible and Easy Bites
- Total Time: 80 minutes
- Yield: 24 pops 1x
- Diet: Vegetarian
Description
You make these treats with red velvet cake and frosting. You coat them in white chocolate. They are small and have a sweet taste.
Ingredients
- 1 baked red velvet cake
- 0.5 cup cream cheese frosting
- 12 ounces white chocolate wafers
- 2 tablespoons vegetable oil
- 0.25 cup sprinkles
Instructions
- Crumble the cooled cake into a bowl.
- Add the cream cheese frosting to the crumbs.
- Mix the ingredients until they hold together.
- Roll the mixture into small balls.
- Place the balls on a baking sheet.
- Freeze the balls for 20 minutes.
- Melt the chocolate wafers with oil in the microwave.
- Dip each ball into the melted chocolate.
- Top with sprinkles before the chocolate hardens.
- Let the pops rest until firm.
Notes
- Work in small batches to keep the cake cold.
- Use a deep cup for easy dipping.
- Store the pops in the refrigerator.
- Prep Time: 30 minutes
- Cook Time: 30 minutes
- Category: Dessert
- Method: Baking and Dipping
- Cuisine: American
Nutrition
- Calories: 150 kcal
Keywords: Red Velvet Cake Pops, Dessert, Party Snacks, Sweet Treats