
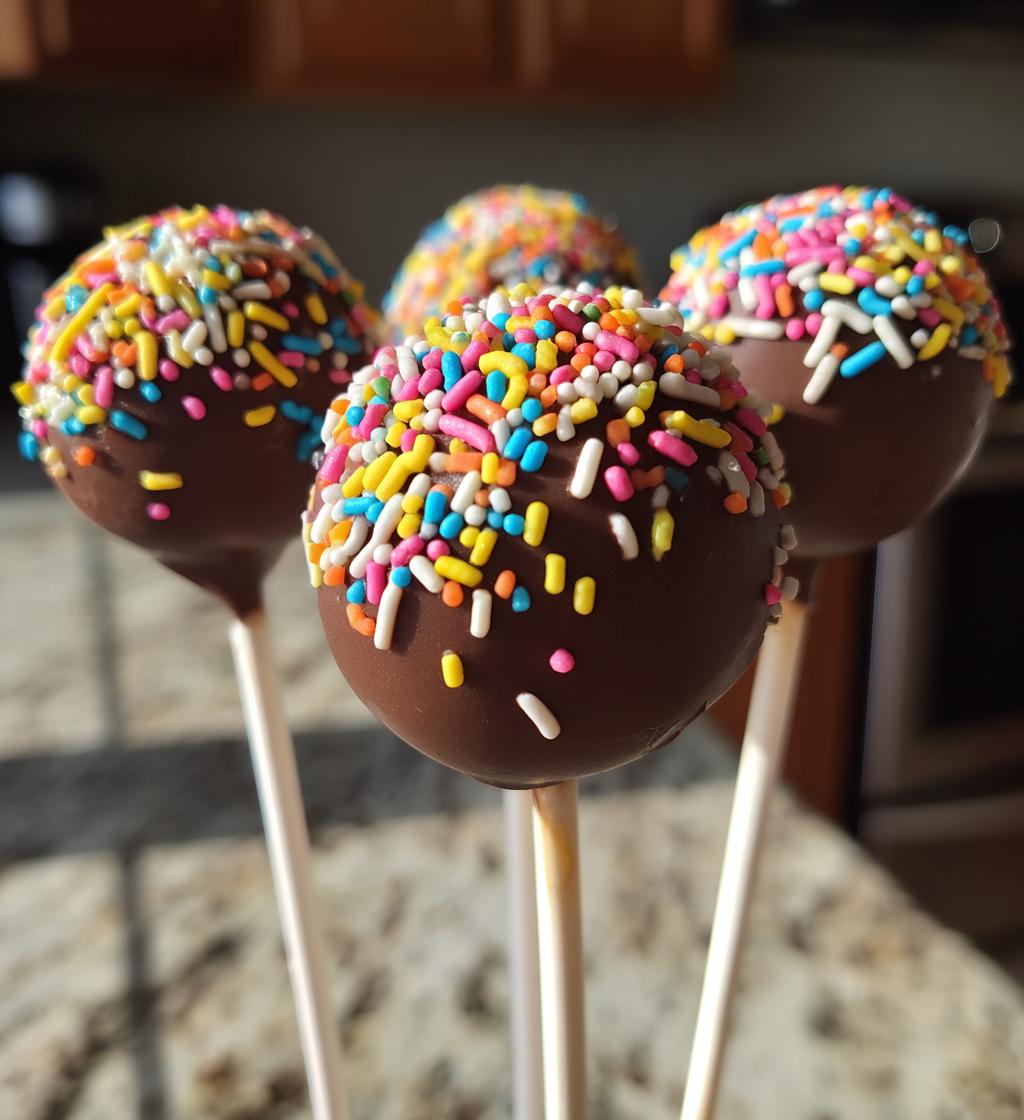
Valentine Oreo Pops: 7 Sweet Treats That Wow Hearts
Oh my goodness, let me tell you about my absolute favorite treat for Valentine’s Day—Valentine Oreo Pops! These little gems are not just eye-catching with their vibrant colors and sprinkles, but they’re also ridiculously easy to make. I remember the first time I made them; it was a last-minute decision for a cozy gathering with friends. We were all just hanging out, and I thought, why not whip up something sweet? Everyone went *crazy* for them! The smiles on their faces when they took that first bite were priceless.
Trust me, making these pops is a breeze and they come together in no time. You’ll only need a handful of ingredients, and the best part? They’re perfect for sharing! Whether you’re surprising your loved one or bringing a festive treat to a party, these Valentine Oreo Pops are sure to impress. Plus, they’re a hit with kids and adults alike—who can resist that chocolatey, creamy goodness? So, let’s dive into how you can make these delightful treats!

Ingredients for Valentine Oreo Pops
- 1 package Oreo cookies (the classic ones are perfect for this!)
- 1 cup chocolate chips (I like using semi-sweet, but feel free to choose your favorite!)
- 1 tablespoon coconut oil (this helps the chocolate melt smoothly)
- Sprinkles for decoration (the more colorful, the better for Valentine’s Day!)
How to Prepare Valentine Oreo Pops
Alright, let’s get into the fun part—making these Valentine Oreo Pops! I promise, it’s super simple and you’ll be amazed at how quickly they come together. Just follow these steps, and soon enough, you’ll have a batch of delightful pops ready to wow everyone!
Step-by-Step Instructions
- First things first, grab that package of Oreo cookies and crush them into fine crumbs. You can use a food processor for a quick job or just pop them in a zip-top bag and go to town with a rolling pin—it’s super satisfying!
- Now, let’s melt the chocolate chips! In a microwave-safe bowl, combine the chocolate chips and the tablespoon of coconut oil. Heat them in the microwave in 30-second intervals, stirring in between until everything’s smooth and shiny. Be careful not to overheat; you want it just melted, not burnt!
- Once your chocolate is melted, stir in those delicious Oreo crumbs until they’re fully mixed in. The combination of chocolate and cookies will smell divine—I can already tell you’ll want to sneak a taste!
- Now, it’s time to form the pops. Take small amounts of the mixture and roll them into balls, about the size of a tablespoon. Insert a stick into each ball, making sure it goes in deep enough to hold but not all the way through.
- Place the pops on a parchment-lined baking sheet and chill them in the refrigerator for about 15-20 minutes. This step is crucial, as it helps them firm up so they don’t fall apart when you dip them!
- After they’ve chilled, it’s time to dip! Melt a bit more chocolate if you need to, and then dip each pop into the chocolate, making sure it’s fully coated. Let the excess chocolate drip off, then sprinkle them with colorful sprinkles while the chocolate is still wet.
- Finally, let the pops sit on the parchment to set. If you’re in a hurry, you can pop them back in the fridge for a few minutes to speed up the setting process. And voila! You’ve got yourself some adorable Valentine Oreo Pops!
Feel free to get creative with the sprinkles or even add a drizzle of white chocolate on top for a fancy touch. Just remember, the more fun the decoration, the more festive they’ll look! Now, let’s get ready to share these sweet treats!
Why You’ll Love This Recipe
- Super quick to prepare—ready in just about 30 minutes!
- Deliciously addictive with that perfect blend of chocolate and Oreo flavors.
- Perfect for all kinds of celebrations, from Valentine’s Day to birthday parties.
- Customizable with your favorite sprinkles and toppings, making each batch unique.
- No baking required, so it’s a hassle-free treat anyone can make!
- Great for kids and adults alike—everyone loves these fun pops!
- They look adorable on any dessert table, adding a festive touch.
- Leftovers (if there are any!) can be stored easily for a sweet snack later.
Tips for Success
Before you dive into making your Valentine Oreo Pops, here are some of my top tips to ensure they turn out perfectly every time! Trust me, a little prep goes a long way in making these treats a hit.
- Chill Time is Key: Don’t rush the chilling process! Letting the pops firm up in the refrigerator for at least 15-20 minutes is crucial. It helps them hold their shape and makes dipping so much easier.
- Mix It Up with Sprinkles: Get creative with your sprinkles! Use a mix of colors and shapes to make your pops really pop. Think heart-shaped sprinkles for an extra touch of love!
- Watch the Melting: When melting your chocolate, keep an eye on it! Chocolate can go from perfect to burnt in a matter of seconds. Stirring every 30 seconds helps to ensure even melting.
- Use Sturdy Sticks: Make sure your sticks are sturdy enough to hold the pops. I prefer using lollipop sticks, but you can also use pretzel sticks for a fun twist!
- Drizzle for Extra Flair: If you’re feeling fancy, drizzle some white chocolate over the finished pops for a beautiful finishing touch. It adds a nice contrast and looks super cute!
- Store Wisely: Keep any leftovers in a cool place to maintain their firmness. A sealed container in the fridge works perfectly to keep them fresh and ready for snacking!
With these tips in hand, you’re all set to create some truly delightful Valentine Oreo Pops that everyone will adore. Happy popping!
Nutritional Information
Alright, let’s talk numbers! Here’s a quick breakdown of the estimated nutritional values for each delicious Valentine Oreo Pop. Keep in mind these are estimates and can vary based on the specific ingredients you use, but they give you a good idea of what to expect:
- Serving Size: 1 pop
- Calories: 150
- Sugar: 12g
- Fat: 7g
- Saturated Fat: 4g
- Unsaturated Fat: 2g
- Trans Fat: 0g
- Carbohydrates: 20g
- Fiber: 1g
- Protein: 2g
- Cholesterol: 0mg
These little treats pack a sweet punch without being too heavy, making them a fun addition to your Valentine’s Day festivities. So, enjoy in moderation, and don’t hesitate to share a few with your loved ones! Happy indulging!
FAQ About Valentine Oreo Pops
I know you might have some questions about making these delightful Valentine Oreo Pops, so let’s tackle a few common ones that come up! Trust me, I’ve been there, and I want to help you make these treats as easy and fun as possible.
Can I make these pops in advance?
Absolutely! You can prepare the pops a day or two ahead of time. Just follow all the steps until the pops are coated with chocolate and sprinkles, then store them in an airtight container in the refrigerator. They’ll be ready to impress when you need them!
How should I store leftover Valentine Oreo Pops?
If you happen to have any leftovers (which is a big *if*, let’s be honest!), store them in a cool place. An airtight container in the fridge works great to keep them fresh and maintain their firmness. Just remember, they’re best enjoyed within a week!
Can I use different types of chocolate?
Of course! While I love semi-sweet chocolate for a classic taste, you can totally switch it up. White chocolate, milk chocolate, or even dark chocolate can bring a whole new flavor profile to your pops. Just keep an eye on the melting process, as different chocolates can behave a bit differently!
What if I don’t have coconut oil?
No worries at all! If you don’t have coconut oil on hand, you can substitute it with vegetable oil or even a bit of butter. Just remember, the coconut oil helps the chocolate melt smoothly, so whatever you choose, it should work fine!
Can I use gluten-free Oreos?
Yes! If you or someone you’re making these for has gluten sensitivities, gluten-free Oreos are a fantastic option. They taste just as delicious, and you won’t lose any of that wonderful flavor!
How do I keep the chocolate from cracking?
Great question! To prevent cracking, make sure you dip the pops in warm melted chocolate and allow them to set at room temperature. If you’re in a hurry, a quick chill in the fridge can help—just don’t let them chill too long, or they might crack when you take them out!
With these tips and answers, you’re all set to create the most amazing Valentine Oreo Pops! Don’t hesitate to reach out if you have more questions—happy popping!
Serving Suggestions
Now that you’ve made these adorable Valentine Oreo Pops, let’s talk about how to serve them up in style! Trust me, presentation can take your sweet treats to the next level, and there are so many fun ways to showcase these pops.
First off, you can’t go wrong by pairing them with a scoop of ice cream. Imagine a rich, creamy vanilla or chocolate ice cream alongside your pops—what a heavenly combination! You could even create a little sundae bar with various toppings and let everyone build their own sweet creation. Kids (and let’s be real, adults too!) will love it!
Another idea is to arrange the Valentine Oreo Pops on a beautiful dessert platter. You can mix in some fresh strawberries or raspberries for a pop of color and a touch of freshness. It not only looks gorgeous but also balances out the sweetness of the pops. Plus, the contrasting colors are just perfect for Valentine’s Day!
If you’re hosting a party, consider sticking them in a floral foam block or a small vase filled with candies to create a fun centerpiece. It’s a playful way to display your treats and makes it easy for guests to grab one (or two!).
And for those extra special touches, you could even drizzle some melted chocolate over the ice cream or sprinkle some crushed Oreos on top for added crunch. The options are endless, and I can’t wait for you to get creative with your presentations!
No matter how you choose to serve them, these Valentine Oreo Pops are sure to be a hit and will add a lovely touch to your celebrations. Enjoy every bite and the smiles they bring!
Storage & Reheating Instructions
Alright, let’s make sure those Valentine Oreo Pops stay as delightful as the day you made them! Proper storage is key to maintaining their firmness and flavor, so here’s what you need to know.
First off, if you happen to have any leftovers (which, let’s be honest, might be a rare occurrence!), you’ll want to store them in an airtight container. Just pop them in the fridge; this keeps them nice and cool while preserving that delicious chocolate coating. They’ll stay fresh for about a week, so you can enjoy them a little longer!
It’s important to keep them in a cool place, especially since warm temperatures can cause them to soften and lose their shape. If you’re worried about them getting squished, you can even layer some parchment paper between the pops in the container. That way, they won’t stick together or get damaged!
Now, if you’re thinking about freezing them for a later date—great idea! Just make sure to wrap each pop individually in plastic wrap before placing them in a freezer-safe container. They can be frozen for up to two months. When you’re ready to enjoy them, just take them out and let them thaw in the fridge for a couple of hours. No reheating needed; you want that perfect chilled bite!
With these storage tips, you’ll keep those Valentine Oreo Pops in tip-top shape and ready to satisfy your sweet tooth whenever the craving strikes! Enjoy!
Print
Valentine Oreo Pops: 7 Sweet Treats That Wow Hearts
- Total Time: 30 minutes
- Yield: 24 pops 1x
- Diet: Vegetarian
Description
Delicious Valentine-themed Oreo pops coated in chocolate.
Ingredients
- 1 package Oreo cookies
- 1 cup chocolate chips
- 1 tablespoon coconut oil
- Sprinkles for decoration
Instructions
- Crush the Oreo cookies into fine crumbs.
- Melt the chocolate chips with coconut oil in a microwave.
- Mix the Oreo crumbs into the melted chocolate.
- Form the mixture into small balls and insert sticks.
- Chill in the refrigerator until firm.
- Dip each pop into melted chocolate and coat with sprinkles.
- Allow to set before serving.
Notes
- Use different colored sprinkles for variety.
- Store in a cool place to maintain firmness.
- Prep Time: 20 minutes
- Cook Time: 10 minutes
- Category: Dessert
- Method: No-bake
- Cuisine: American
Nutrition
- Serving Size: 1 pop
- Calories: 150
- Sugar: 12g
- Sodium: 50mg
- Fat: 7g
- Saturated Fat: 4g
- Unsaturated Fat: 2g
- Trans Fat: 0g
- Carbohydrates: 20g
- Fiber: 1g
- Protein: 2g
- Cholesterol: 0mg
Keywords: Valentine Oreo Pops, dessert, chocolate, Oreo