
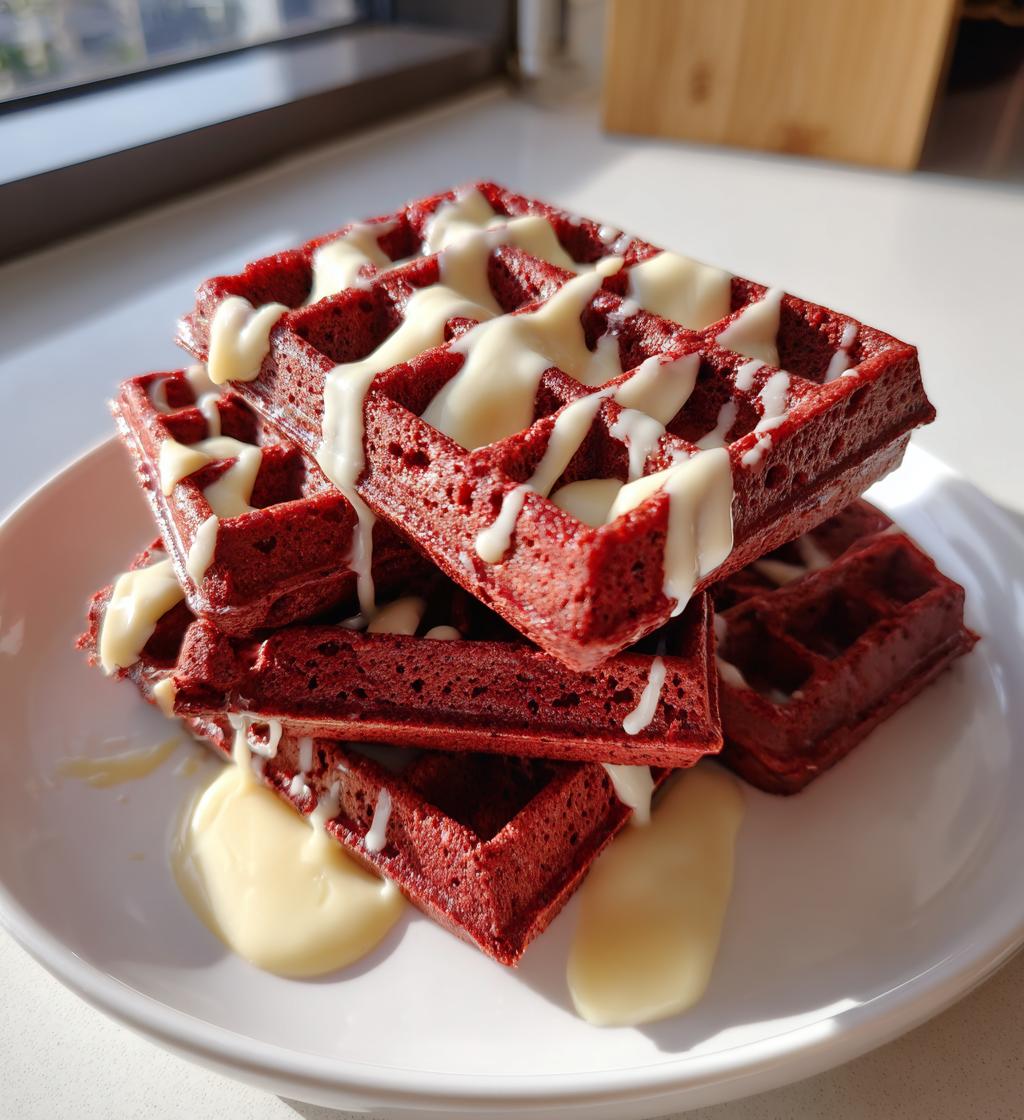
Red Velvet Waffles: 7 Irresistible Tips for Culinary Bliss
Oh my goodness, let me tell you about the magic of Red Velvet Waffles! They’re not just your regular breakfast fare; they bring a delightful twist to your morning routine. The moment you bite into one, you’ll experience that rich, cocoa flavor paired with a subtle hint of vanilla that’s just so comforting. Trust me, the vibrant red color alone makes them feel like a special occasion. I whip these up for brunch with friends or cozy Sunday mornings when I want to treat myself—and they always steal the show! There’s something about that soft, fluffy texture and the way they soak up maple syrup that just screams indulgence. So, if you’re ready to elevate your waffle game and delight your taste buds, let’s dive into making these delicious beauties!
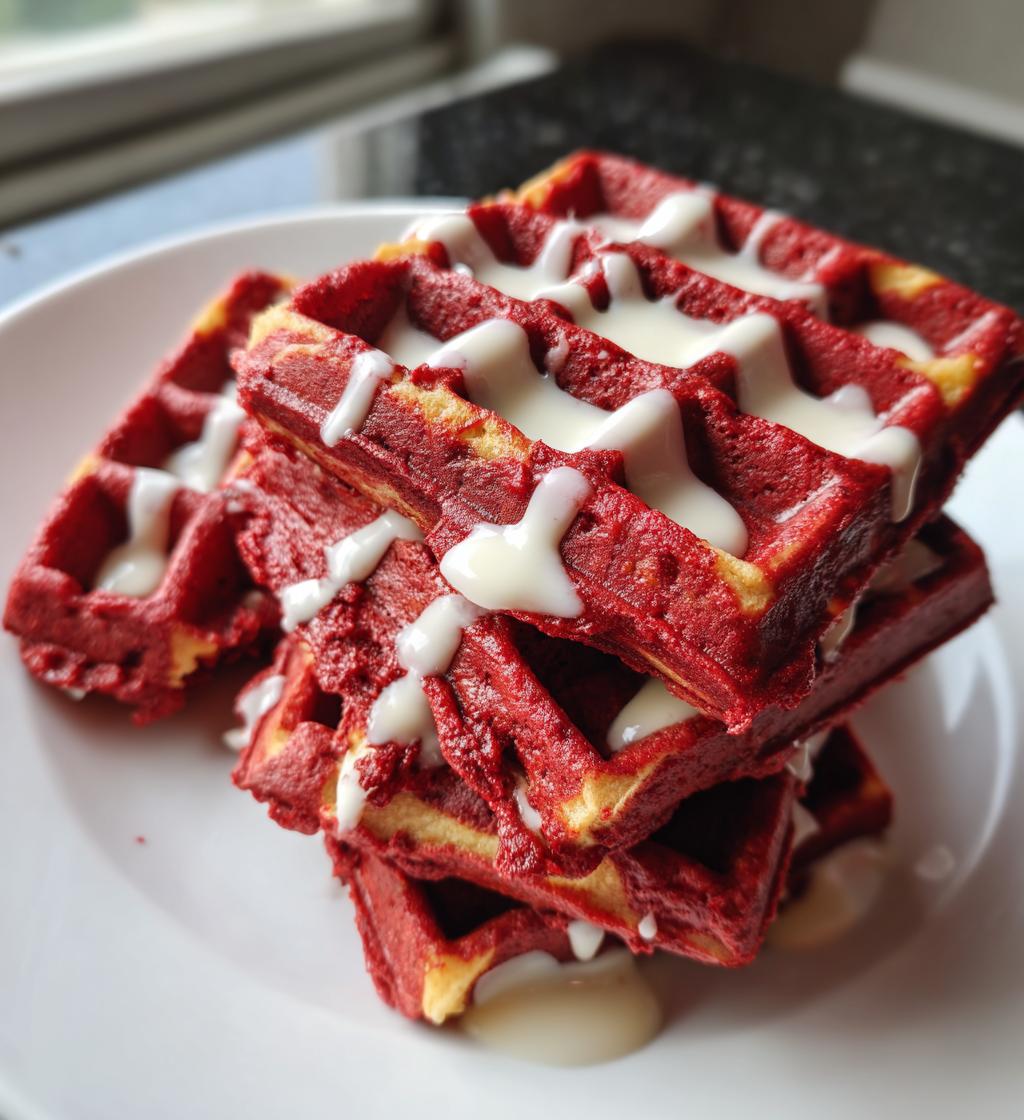
Ingredients List
- 1 cup all-purpose flour
- 1 tablespoon cocoa powder (gives that lovely chocolatey depth)
- 1 tablespoon sugar (just a touch for sweetness)
- 1 teaspoon baking powder (for that perfect lift)
- 1/2 teaspoon baking soda (helps the waffles rise and stay fluffy)
- 1/4 teaspoon salt (balances the sweetness)
- 1 cup buttermilk (for that rich, tangy flavor and moisture)
- 1 large egg (binds everything together beautifully)
- 2 tablespoons vegetable oil (adds richness and keeps them tender)
- 1 tablespoon red food coloring (this is what makes them pop!)
- 1 teaspoon vanilla extract (because who doesn’t love vanilla?)
How to Prepare Red Velvet Waffles
- First things first, preheat your waffle iron! This is key to getting those perfectly crispy edges while keeping the inside soft and fluffy.
- In a medium-sized bowl, whisk together the all-purpose flour, cocoa powder, sugar, baking powder, baking soda, and salt. Make sure everything is well combined, as this will help your waffles rise beautifully!
- In another bowl, mix together the buttermilk, large egg, vegetable oil, red food coloring, and vanilla extract. You want to whisk this until it’s nice and smooth—no lumps allowed!
- Now, gently pour the wet ingredients into the dry ingredients. It’s important not to overmix here; just stir until everything is combined. A few small lumps are perfectly fine, and trust me, they won’t affect the final result!
- Once your batter is ready, carefully ladle it into the preheated waffle iron. The amount will depend on your iron, but I usually aim for about a cup of batter per waffle.
- Close the lid and let the waffles cook until they’re golden brown. This usually takes about 4-5 minutes, but keep an eye on them! Every waffle iron is a little different, so you might need to adjust the time slightly.
- When they’re done, carefully remove the waffles (they’ll be hot!) and serve them right away with your favorite toppings.
Nutritional Information
Now, let’s talk about how these delightful Red Velvet Waffles fit into your day! Each waffle is estimated to provide:
- Calories: 250
- Fat: 10g
- Saturated Fat: 1.5g
- Unsaturated Fat: 7g
- Trans Fat: 0g
- Cholesterol: 40mg
- Sodium: 300mg
- Carbohydrates: 37g
- Fiber: 1g
- Sugar: 8g
- Protein: 5g
Keep in mind, these values are estimates and can vary based on the specific ingredients you use. But hey, when you’re treating yourself to something as fun as Red Velvet Waffles, a little indulgence is totally worth it, right?
Why You’ll Love This Recipe
- Deliciously unique flavor that combines the richness of cocoa with a hint of vanilla.
- Quick and easy to whip up—perfect for busy mornings or lazy brunches.
- Visually stunning with that vibrant red color, making them a showstopper for any occasion.
- Perfectly fluffy and light, these waffles are a delightful treat that everyone will adore.
- Versatile enough to dress up with your favorite toppings, from whipped cream to fresh berries.
- Great for special occasions like Valentine’s Day or birthdays, adding a festive flair to your table.
- Fun to make and share, bringing a sense of joy and indulgence to your breakfast routine.
Tips for Success
Alright, let’s make sure your Red Velvet Waffles turn out absolutely perfect every time! Here are my top tips for success:
- Don’t Overmix: When combining the wet and dry ingredients, be gentle! Overmixing can lead to tough waffles. Just stir until you see no dry flour, and it’s totally fine if there are a few lumps.
- Check Your Waffle Iron: Every waffle iron is different. You might need to adjust the cooking time based on yours. Start with the recommended time, but keep an eye on them. You’re looking for that golden brown color!
- Use Buttermilk: It’s a game-changer! The acidity in buttermilk not only adds flavor but also helps make your waffles tender and fluffy. So don’t skip it!
- Let Them Rest: If you can, let the batter sit for about 5 minutes before cooking. This can help the baking powder activate and lead to fluffier waffles.
- Experiment with Toppings: Try different toppings like cream cheese frosting, fresh fruit, or even a drizzle of chocolate sauce. They can take your waffles to the next level!
- Keep Them Warm: If you’re making a big batch, keep the finished waffles warm in a low oven (about 200°F or 93°C) until you’re ready to serve. This way, everyone can enjoy them hot and crispy!
With these tips, you’ll be a Red Velvet Waffle pro in no time. Trust me, your brunch guests will be raving about them!
Variations
Let’s get creative with these delightful Red Velvet Waffles! There are so many fun ways to mix things up and make them even more special. Here are some of my favorite variations:
- Chocolate Chip Delight: Stir in some mini chocolate chips into the batter before cooking for a sweet surprise in every bite! They add a melty, gooey texture that’s simply irresistible.
- Nutty Flavor: Add chopped walnuts or pecans to the batter for a delightful crunch. The nutty flavor pairs beautifully with the rich cocoa, giving your waffles an extra depth.
- Berry Blast: Top your waffles with fresh strawberries, raspberries, or blueberries. Not only do they add a pop of color, but the tartness of the berries contrasts perfectly with the sweetness of the waffles.
- Cream Cheese Swirl: Mix some softened cream cheese with a little sugar and vanilla, then swirl it into the batter before cooking. It adds a luscious creaminess that takes these waffles to a whole new level!
- Spiced Up: Want to add a little warmth? Try mixing in a pinch of cinnamon or nutmeg to the batter. It brings a cozy flavor that’s perfect for chilly mornings.
- Decadent Toppings: Go all out with toppings! Think whipped cream, chocolate sauce, or even a drizzle of caramel. You can create your own waffle bar and let everyone customize their own delicious stack.
These variations not only keep things exciting but also allow you to cater to everyone’s tastes. So don’t hesitate to experiment and find your favorite twist on these scrumptious Red Velvet Waffles!
Storage & Reheating Instructions
So, you’ve made a delicious batch of Red Velvet Waffles and have some leftovers? No worries! Here’s how to store them properly so they stay tasty for your next breakfast or brunch.
- Storing Leftovers: Allow the waffles to cool completely before storing. This prevents moisture buildup, which can make them soggy. Place them in an airtight container or a resealable plastic bag, separating layers with parchment paper if you have multiple waffles. They’ll keep well in the refrigerator for up to 3 days.
- Freezing: If you want to save some for later, you can freeze them! Just make sure they’re fully cooled, then wrap each waffle tightly in plastic wrap and place them in a freezer-safe bag. They can be frozen for up to 2 months. When you’re ready to enjoy them, just pop them in the toaster or oven for a quick reheat!
Reheating: For the best crispy texture, I recommend using a toaster. Simply pop them in until they’re heated through and crispy on the outside—usually just a few minutes. If you prefer using the oven, preheat it to 350°F (175°C) and place the waffles directly on the rack or a baking sheet for about 10-15 minutes. This will help revive that wonderful texture!
With these storage and reheating tips, you can enjoy your Red Velvet Waffles anytime you crave that delightful flavor—no need to whip up a fresh batch every time!
Serving Suggestions
Now that you’ve got your scrumptious Red Velvet Waffles, let’s talk about how to make them even more irresistible with some fabulous toppings and sides! Trust me, the right accompaniments can elevate your breakfast or brunch experience to a whole new level.
- Classic Maple Syrup: You can’t go wrong with a warm drizzle of maple syrup. It adds that perfect touch of sweetness that complements the cocoa flavor of the waffles beautifully!
- Whipped Cream: Light and fluffy whipped cream is a must! It creates a dreamy, indulgent topping that’s bound to impress. You can even sweeten it a bit with vanilla or a dusting of powdered sugar!
- Fresh Berries: Top your waffles with a colorful mix of fresh strawberries, blueberries, or raspberries. The brightness and tartness of the berries contrast wonderfully with the sweet waffles, plus they make your plate look extra pretty!
- Cream Cheese Frosting: For a decadent twist, why not spread a bit of cream cheese frosting on top? It adds that classic red velvet cake flavor and is just divine!
- Nuts: Sprinkle some chopped pecans or walnuts for a crunchy texture. They add a lovely nutty flavor that pairs perfectly with the soft waffles.
- Chocolate Sauce: Feeling indulgent? Drizzle some chocolate sauce over the top for a rich, gooey treat that chocolate lovers will adore!
- Coconut Flakes: For a tropical twist, sprinkle some toasted coconut flakes on top. It adds a lovely texture and a hint of sweetness that complements the waffles beautifully.
- Ice Cream: Why not go all out? A scoop of vanilla or cream cheese ice cream on top of a warm waffle is the ultimate treat! It melts into the waffles and creates a delightful dessert experience.
With these serving suggestions, you can create your own delicious masterpiece with Red Velvet Waffles. Don’t be afraid to mix and match to find your perfect combination. Happy brunching!
FAQ Section
Got questions about making these fabulous Red Velvet Waffles? I’ve got answers! Here are some of the most common questions I get, along with my best tips:
Can I make these waffles gluten-free?
Absolutely! Just substitute the all-purpose flour with a gluten-free flour blend. Make sure to check that your baking powder and other ingredients are also gluten-free, and you’ll be set!
What can I use instead of buttermilk?
If you don’t have buttermilk on hand, no worries! You can easily make a substitute by mixing 1 cup of regular milk with 1 tablespoon of white vinegar or lemon juice. Let it sit for about 5 minutes, and you’ll have your buttermilk replacement!
How do I know when my waffles are done?
Great question! Waffles are typically done when they’re golden brown and the steam has slowed down significantly. If your waffle iron has a light, it will usually indicate when they’re ready. Just keep an eye on them to avoid overcooking!
Can I double the recipe?
Of course! Just double all the ingredients, and you’ll have plenty of delicious waffles to share. Just be mindful of your waffle iron’s capacity—you may need to cook them in batches!
What’s the best way to store leftover waffles?
Let the waffles cool completely before storing them in an airtight container in the refrigerator for up to 3 days. You can also freeze them for longer storage—just wrap them individually in plastic wrap and place them in a freezer bag. They’ll stay good for about 2 months!
Can I make the batter ahead of time?
I recommend making the batter fresh for the best texture, but if you need to prepare it in advance, you can store it in the refrigerator for a few hours. Just give it a good stir before using, as it may thicken up a bit.
What if I don’t have a waffle iron?
No problem! You can use a pancake griddle or skillet instead. Just pour the batter onto the preheated surface and cook until bubbles form on the surface, then flip and cook until golden brown on both sides. They won’t have the same shape, but they’ll still taste delicious!
With these answers, I hope you feel more confident diving into the world of Red Velvet Waffles. Enjoy every delightful bite!
Print
Red Velvet Waffles: 7 Irresistible Tips for Culinary Bliss
- Total Time: 25 minutes
- Yield: 4 servings 1x
- Diet: Vegetarian
Description
Delicious red velvet waffles perfect for breakfast or brunch.
Ingredients
- 1 cup all-purpose flour
- 1 tablespoon cocoa powder
- 1 tablespoon sugar
- 1 teaspoon baking powder
- 1/2 teaspoon baking soda
- 1/4 teaspoon salt
- 1 cup buttermilk
- 1 large egg
- 2 tablespoons vegetable oil
- 1 tablespoon red food coloring
- 1 teaspoon vanilla extract
Instructions
- Preheat your waffle iron.
- In a bowl, mix flour, cocoa powder, sugar, baking powder, baking soda, and salt.
- In another bowl, whisk buttermilk, egg, oil, food coloring, and vanilla.
- Combine wet and dry ingredients until just mixed.
- Pour batter into the waffle iron and cook until golden brown.
- Serve with syrup or whipped cream.
Notes
- Store leftovers in the refrigerator.
- Reheat in a toaster for a crispy texture.
- Prep Time: 10 minutes
- Cook Time: 15 minutes
- Category: Breakfast
- Method: Waffle
- Cuisine: American
Nutrition
- Serving Size: 1 waffle
- Calories: 250
- Sugar: 8g
- Sodium: 300mg
- Fat: 10g
- Saturated Fat: 1.5g
- Unsaturated Fat: 7g
- Trans Fat: 0g
- Carbohydrates: 37g
- Fiber: 1g
- Protein: 5g
- Cholesterol: 40mg
Keywords: Red Velvet Waffles