
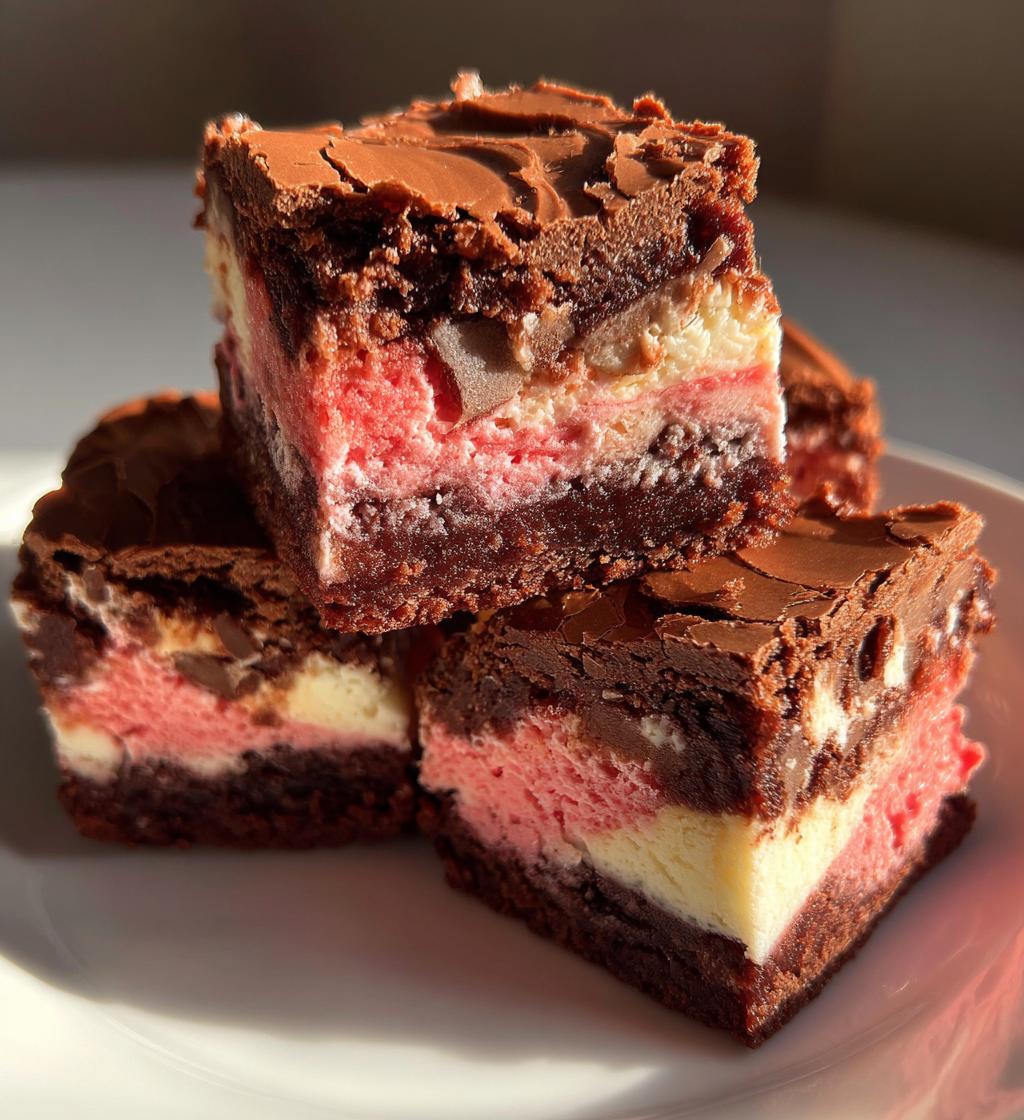
Neapolitan Cookie Bars: 7 Layers of Sweet Bliss
Oh my goodness, let me tell you about my Neapolitan Cookie Bars! They’re like a delightful trip down memory lane, bringing together those classic chocolate, vanilla, and strawberry flavors that just make my heart sing. I remember the first time I baked these beauties; the kitchen filled with that wonderful aroma of melting chocolate and sweet strawberries—it was pure magic! The layers are not just visually stunning; they create a symphony of flavors in every bite. You get that rich chocolatey goodness, the smooth creaminess of vanilla, and the bright, fruity burst of strawberry all at once. Seriously, what’s not to love? Whether you’re hosting a gathering or just want a sweet treat for yourself, these bars are bound to impress and bring joy to everyone lucky enough to snag a piece!
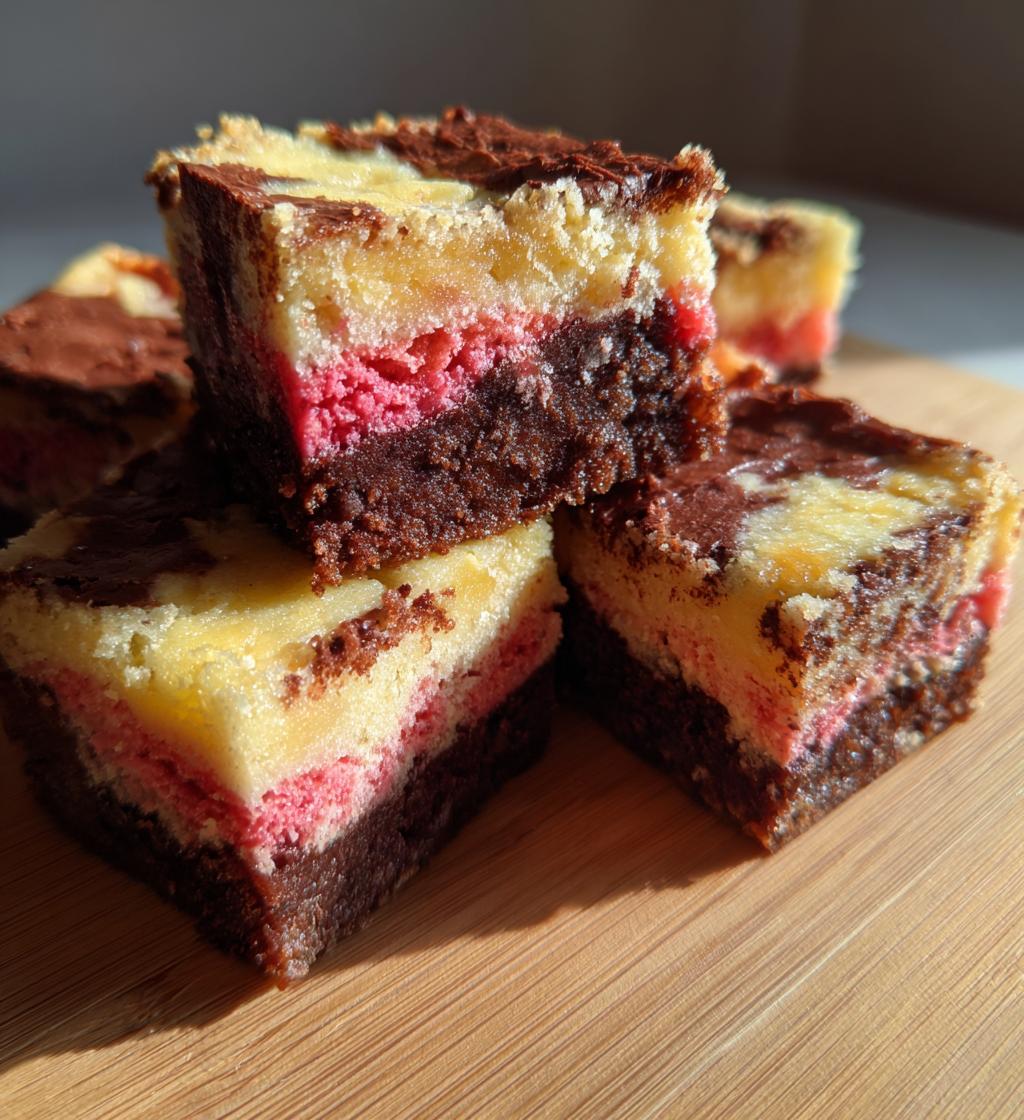
Ingredients for Neapolitan Cookie Bars
Alright, let’s gather everything you’ll need to make these scrumptious Neapolitan Cookie Bars! Having all your ingredients ready is key to a smooth baking experience, so let’s dive in:
- 1 cup unsalted butter, softened
- 1 cup granulated sugar
- 1 cup packed brown sugar
- 2 large eggs
- 2 teaspoons vanilla extract
- 3 cups all-purpose flour
- 1 teaspoon baking soda
- 1/2 teaspoon salt
- 1/2 cup cocoa powder
- 1/2 cup strawberry puree
- 1/2 cup white chocolate chips
Trust me, using high-quality ingredients will elevate your bars to a whole new level! And remember, feel free to get creative with the strawberry puree—you can swap it out for jam if that’s what you have on hand. Happy baking!
How to Prepare Neapolitan Cookie Bars
Now, let’s get to the fun part—preparing these fabulous Neapolitan Cookie Bars! Follow these steps, and you’ll have a colorful, delicious treat to share (or keep all to yourself, no judgment here!).
Preheat the Oven
First things first, you’ll want to preheat your oven to 350°F (175°C). Preheating is super important because it ensures your bars bake evenly and come out perfectly golden. Trust me, you don’t want to skip this step!
Cream the Butters and Sugars
In a large mixing bowl, cream together the softened unsalted butter, granulated sugar, and brown sugar. I like to use a hand mixer for this part, but a good ol’ wooden spoon works too! You’re aiming for a light and fluffy texture—about 2-3 minutes of mixing should do the trick. This is where all the magic begins!
Mix in the Eggs and Vanilla
Next up, add in the two large eggs and the vanilla extract. Mix until everything is well combined, but don’t overdo it! You want it to be just blended—think smooth and creamy but not overly whipped. The aroma of vanilla will start to fill your kitchen, and oh boy, it’s heavenly!
Combine Dry Ingredients
In another bowl, measure out your all-purpose flour, baking soda, and salt. Whisk them together so they’re evenly combined. This step helps avoid any clumps of baking soda later on. Then, gradually add the dry ingredients to the wet mixture, stirring gently until just combined. You want to keep that fluffy texture!
Divide the Dough
Now it’s time to divide the dough into three equal parts. I find it easiest to weigh the dough on a kitchen scale, but if you don’t have one, just eyeball it! Each part will be for our chocolate, vanilla, and strawberry layers. Make sure they’re as equal as possible for even baking!
Prepare the Chocolate, Vanilla, and Strawberry Layers
For the chocolate layer, take one part of the dough and mix in the cocoa powder until fully incorporated. For the strawberry layer, fold in the strawberry puree gently into the second part of the dough. The last part will remain vanilla—easy peasy! You’ll love the vibrant colors!
Layer the Dough in the Pan
Grab a greased baking pan (I usually use a 9×13 inch one). Start by spreading the chocolate dough evenly on the bottom, then layer the vanilla dough on top. Finally, gently spread the strawberry dough to create a beautiful three-layer masterpiece. Don’t worry if it gets a bit messy; it’ll all come together beautifully!
Bake the Bars
Pop the pan into your preheated oven and bake for 25-30 minutes. You’ll know they’re done when the edges look golden and the center is set (a toothpick should come out clean). Keep an eye on them; ovens can be sneaky!
Cool and Cut
Once your bars are out of the oven, let them cool in the pan for about 10 minutes. Then, carefully transfer them to a wire rack to cool completely. When they’re cool, use a sharp knife to cut them into bars. I like to cut them into squares for a classic look, but feel free to get creative—triangles, anyone?
Why You’ll Love This Recipe
- They’re a delightful mash-up of chocolate, vanilla, and strawberry flavors that will satisfy any sweet tooth!
- Quick and easy to make, these bars come together in under an hour—perfect for when you’re short on time but still want something special.
- With their vibrant layers, they look impressive and are perfect for parties, potlucks, or any gathering where you want to wow your guests.
- Super customizable! Feel free to swap out the strawberry puree for your favorite fruit or even add nuts for an extra crunch.
- They store well, so you can make a big batch and enjoy them throughout the week. Just try not to eat them all at once!
- Kid-friendly and fun to make together—let them help with mixing and layering for a sweet family bonding experience.
Nutritional Information
Now, let’s talk numbers! Each serving of these delightful Neapolitan Cookie Bars is estimated to pack a tasty punch while still being mindful of your cravings. Here’s a breakdown of the typical nutritional values per bar:
- Calories: 200
- Fat: 10g
- Saturated Fat: 5g
- Unsaturated Fat: 3g
- Trans Fat: 0g
- Cholesterol: 30mg
- Sodium: 150mg
- Carbohydrates: 28g
- Fiber: 1g
- Sugar: 12g
- Protein: 2g
Keep in mind that these values are estimates and can vary based on the specific ingredients you use. But hey, a little indulgence never hurt anyone, right? Enjoy your bars and savor every bite!
Tips for Success with Neapolitan Cookie Bars
Alright, before you dive in, here are some pro tips to ensure your Neapolitan Cookie Bars turn out perfectly every time. Trust me, a little extra care can make a big difference!
- Check Your Oven Temperature: Ovens can be a bit temperamental, so it’s a good idea to use an oven thermometer if you have one. This way, you can ensure that your bars bake at the right temperature. If your oven runs hot or cold, you might need to adjust the baking time accordingly.
- Don’t Overmix: When combining your ingredients, especially after adding the flour, be gentle! Overmixing can lead to dense bars instead of the light, fluffy texture we’re aiming for. Just mix until the dry ingredients are incorporated, and you’re good to go!
- Use Room Temperature Ingredients: Make sure your butter and eggs are at room temperature before you start. This helps everything mix together smoothly and creates that lovely, creamy texture.
- Cool Properly: Don’t rush the cooling process! Allow your bars to cool in the pan for about 10 minutes before transferring them to a wire rack. This helps them set properly and makes them easier to cut later.
- Experiment with Flavors: Feel free to get creative! You can try different fruit purees or even add a dash of almond extract for a unique twist. The beauty of these bars is that they’re super versatile!
- Cut When Cool: Wait until your bars are completely cool before cutting them. This helps maintain their shape and makes for cleaner slices. Plus, it’ll be worth the wait when you see those beautiful layers!
Follow these tips, and you’ll be well on your way to baking up some stunning Neapolitan Cookie Bars that everyone will love. Happy baking!
Variations on Neapolitan Cookie Bars
Oh, the fun doesn’t stop with just the classic Neapolitan flavors! There are so many delicious twists you can put on these cookie bars that’ll keep your taste buds dancing. Here are some of my favorite variations that you can easily try:
- Peanut Butter Swirl: Mix in some creamy peanut butter into the vanilla layer for a nutty twist. Just swirl it in gently before baking for a delightful combination of flavors!
- Mint Chocolate: Replace the cocoa powder with mint chocolate chips in the chocolate layer. The fresh minty flavor pairs beautifully with the vanilla and strawberry layers for a refreshing treat.
- Raspberry Bliss: Swap out the strawberry puree for raspberry puree for a tangy and vibrant alternative. It’ll give your bars a lovely tartness that balances perfectly with the other flavors.
- Coconut Delight: Add shredded coconut to the vanilla layer for a tropical vibe! You can also use coconut extract instead of vanilla for an extra boost of flavor.
- Dark Chocolate: For all the dark chocolate lovers out there, use dark cocoa powder instead of regular cocoa powder for a richer chocolate layer that’s sure to impress.
- Funfetti: Mix in some colorful sprinkles into the vanilla layer to turn these bars into a festive treat! Perfect for birthdays or any celebration.
- Caramel Drizzle: Drizzle some homemade or store-bought caramel sauce on top of the baked bars for an indulgent finish that adds a sweet, gooey layer to each bite.
Feel free to experiment with these ideas or come up with your own! The beauty of Neapolitan Cookie Bars is their versatility, so let your creativity run wild! Happy baking, and I can’t wait to hear about your tasty creations!
Storage & Reheating Instructions
Now that you’ve got these delicious Neapolitan Cookie Bars ready, let’s talk about how to keep them fresh and tasty! Proper storage is key to enjoying them for days to come.
To store your cookie bars, simply place them in an airtight container. I usually like to layer parchment paper between the bars to prevent them from sticking together—trust me, it makes all the difference! You can keep them at room temperature for up to 3 days, or if you want to keep them for longer, pop them in the fridge where they’ll stay fresh for up to a week.
If you find yourself with leftover bars (which is rare but can happen!), you can definitely freeze them! Just wrap each bar tightly in plastic wrap, then place them in a freezer-safe bag. They’ll be good for about 2 months. When you’re ready to indulge again, simply thaw them in the fridge overnight, or let them sit out at room temperature for a bit. No need to heat them up, as they’re just as delightful chilled!
So, whether you’re enjoying them fresh out of the oven or savoring them later, these Neapolitan Cookie Bars are a treat that keeps on giving. Enjoy every last bite!
Share Your Thoughts
I’d absolutely love to hear what you think about these Neapolitan Cookie Bars! Have you tried making them? What did you think of the layers and flavors? Did you put your own twist on the recipe? Please leave a comment below and share your experience! Your feedback not only makes my day but also helps fellow bakers find inspiration in your stories.
And if you enjoyed the recipe, don’t forget to rate it! I appreciate every star you give, and it really helps others discover how delicious these bars can be. Let’s create a community of cookie lovers together, where we can share tips, tricks, and love for baking! Can’t wait to hear from you!
Print
Neapolitan Cookie Bars: 7 Layers of Sweet Bliss
- Total Time: 50 minutes
- Yield: 24 bars 1x
- Diet: Vegetarian
Description
Delicious Neapolitan cookie bars with layers of chocolate, vanilla, and strawberry flavors.
Ingredients
- 1 cup unsalted butter, softened
- 1 cup granulated sugar
- 1 cup brown sugar, packed
- 2 large eggs
- 2 teaspoons vanilla extract
- 3 cups all-purpose flour
- 1 teaspoon baking soda
- 1/2 teaspoon salt
- 1/2 cup cocoa powder
- 1/2 cup strawberry puree
- 1/2 cup white chocolate chips
Instructions
- Preheat your oven to 350°F (175°C).
- In a bowl, cream together butter, granulated sugar, and brown sugar.
- Add eggs and vanilla extract, mix well.
- In another bowl, combine flour, baking soda, and salt.
- Gradually add dry ingredients to the wet mixture.
- Divide the dough into three equal parts.
- In one part, mix cocoa powder for chocolate layer.
- In another part, fold in strawberry puree for the strawberry layer.
- Leave the last part as vanilla.
- In a greased pan, layer the chocolate dough, followed by vanilla, and then strawberry.
- Bake for 25-30 minutes or until golden brown.
- Let cool before cutting into bars.
Notes
- Store in an airtight container.
- Can substitute strawberry puree with jam.
- Adjust baking time based on oven performance.
- Prep Time: 20 minutes
- Cook Time: 30 minutes
- Category: Dessert
- Method: Baking
- Cuisine: Italian
Nutrition
- Serving Size: 1 bar
- Calories: 200
- Sugar: 12g
- Sodium: 150mg
- Fat: 10g
- Saturated Fat: 5g
- Unsaturated Fat: 3g
- Trans Fat: 0g
- Carbohydrates: 28g
- Fiber: 1g
- Protein: 2g
- Cholesterol: 30mg
Keywords: Neapolitan Cookie Bars, dessert, baking