
Lotus Cheesecake Dessert
Table of Contents
When it comes to indulgent, no-bake desserts, the Lotus Cheesecake Dessert might just be the queen of them all. It’s got everything you crave—rich creaminess, a smooth mousse-like filling, and the deep caramelized charm of Lotus Biscoff cookies in every single bite.
In this guide, we’re diving deep into everything you need to know about making this wildly popular treat. From its origins and must-have ingredients to step-by-step instructions, top tips, and even regional spins from around the globe—we’ve got it all covered. Oh, and of course, there’s a full Lotus Biscoff cheesecake recipe waiting for you too.
So grab your whisk, and let’s get baking (well, kinda—this one’s mostly fridge work).
Key Ingredients in a Lotus Cheesecake Dessert
Lotus Biscoff Cookies vs. Other Biscuits
Let’s be honest—Lotus Biscoff cookies aren’t just a base; they’re the soul of the Lotus Cheesecake Dessert. These spiced caramelized biscuits have a bold, unmistakable flavor that standard graham crackers simply can’t match.
Because they’re already packed with warm notes of cinnamon and brown sugar, they infuse the crust with deep, toasty goodness. Crushed and mixed with a bit of melted butter, they form a crunchy yet buttery foundation that supports the entire dessert. While other cookies can be used in a pinch, the flavor just won’t hit the same. Seriously—don’t skip the Biscoff.
The Role of Lotus Biscoff Spread in Flavor and Texture
Oh, the spread. This stuff is pure gold.
The Lotus Biscoff spread adds moisture, sweetness, and a creamy richness to the cheesecake filling. It’s blended into the cream cheese mixture to deliver that signature caramel-cookie taste in every single bite. Plus, when gently melted and poured on top, it creates a glossy, dreamy topping that looks as good as it tastes.
Other Must-Have Ingredients: Cream Cheese, Butter, Sugar, Whipping Cream
Here’s the rest of your dream team: full-fat cream cheese (for structure and tang), whipping cream (for a fluffy texture), unsalted butter (to bind the crust), and powdered sugar (for subtle sweetness). Using high-quality, full-fat dairy makes a world of difference here—trust us, this is no time to go “lite.”
Together, these ingredients create a balanced Lotus Cheesecake Dessert that’s indulgent but not overpowering—just the right mix of sweet, creamy, and crunchy.
How to Make a No-Bake Lotus Cheesecake (Step-by-Step)
Making the Lotus Biscuit Base
Start with the base—literally. Crush about 200g of Lotus Biscoff cookies using a food processor (or just bash ’em in a zip bag with a rolling pin—satisfying, right?). Stir in 80g of melted butter until everything is well coated and holds together when pressed.
Then, press this mixture into the bottom of a springform pan, smoothing it out with the back of a spoon or a flat-bottomed glass. Pop it in the fridge while you make the filling. Some folks like to bake it for 8 minutes to crisp it up, but it’s totally optional. Either way, this crust is rich, flavorful, and smells like cozy cinnamon dreams.
Preparing the Light, Airy Lotus Cheesecake Filling
Now the magic happens. In one bowl, whip up cold double cream until it forms stiff peaks. In another, mix full-fat cream cheese, powdered sugar, and a generous scoop of Lotus Biscoff spread. The combo should be smooth, silky, and thick.
Next, gently fold the whipped cream into the cream cheese mix. Do it slowly so you don’t knock out all the air—it’s what gives your Lotus Cheesecake Dessert that mousse-like cloud texture.
Assembling and Setting the Cheesecake in Layers
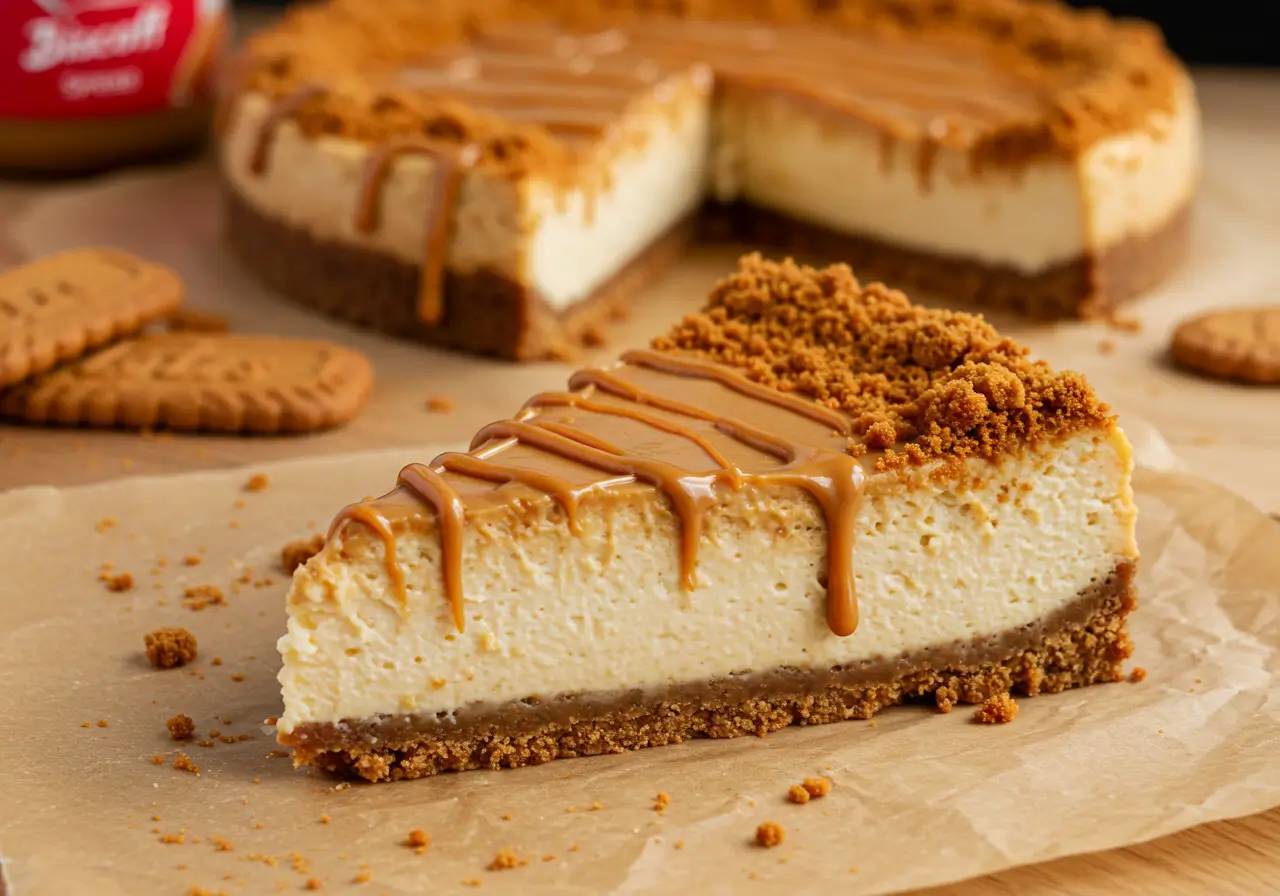
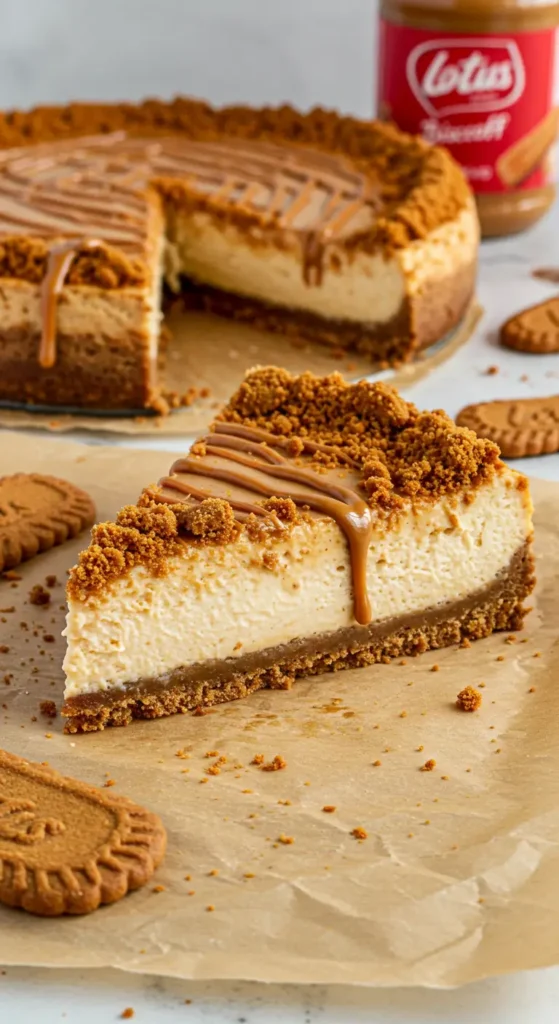
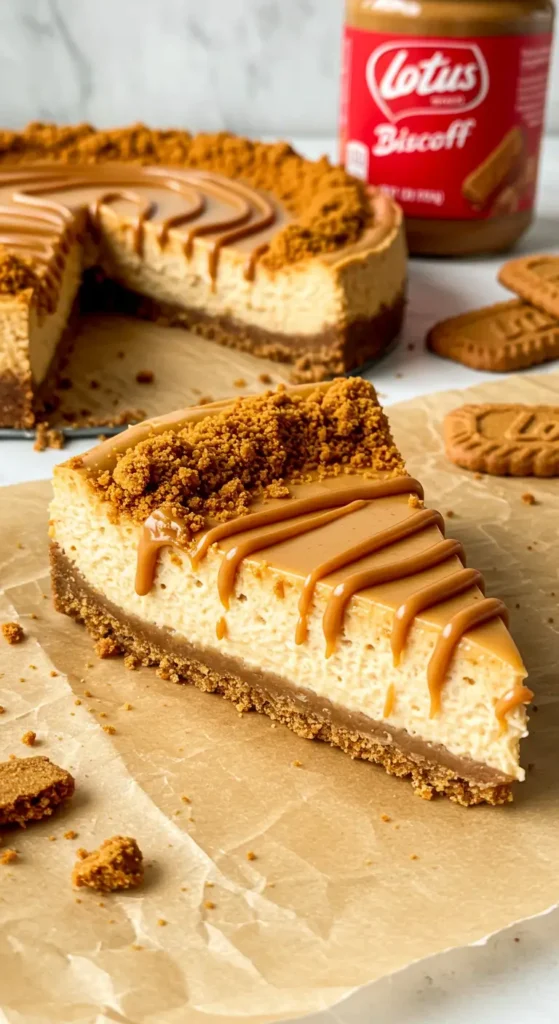
Pour the filling over your chilled biscuit base and smooth out the top. Chill the whole thing in the fridge for at least 4–6 hours—or overnight if you’ve got the patience. Once firm, gently melt some more Biscoff spread and pour it over the top for that shiny, signature finish.
Sprinkle crushed cookies around the edge and voilà—you’ve just made a no-bake Lotus Cheesecake Dessert that’s practically guaranteed to disappear from the table in minutes.
Want it to slice cleanly? Pop it in the freezer for 20 minutes before cutting, and wipe your knife between slices. Easy, right?
Baked vs. No-Bake Lotus Cheesecake Dessert
Do You Really Need to Bake the Crust? Pros and Cons
Here’s the deal—Lotus Cheesecake Dessert doesn’t need to be baked. In fact, the no-bake version is what makes it such a crowd favorite. It’s fast, easy, and perfect for those warmer months when turning on the oven sounds like torture.
That said, lightly baking the Biscoff crust for 8–10 minutes can give it a firmer, toastier finish. It holds together a bit better when sliced and offers a deeper flavor. Still, if you’re short on time or just don’t feel like heating things up, go ahead and skip it. Your cheesecake will still be rich and delicious.
Texture Differences Between No-Bake and Baked Versions
No-bake versions have a mousse-like, airy texture—light, creamy, and cloud-like. Meanwhile, baked cheesecakes are firmer, denser, and feel more like traditional New York-style cheesecake. So it all comes down to your preference: floaty and whipped, or dense and classic.
For more creamy inspiration, check out this Strawberry Cheesecake recipe too!
Tips and Tricks for a Perfect Lotus Cheesecake Dessert
Whipping Cream to the Right Consistency
Want that airy, mousse-like texture that makes your Lotus Cheesecake Dessert unforgettable? Then get the whipped cream just right.
Always start with super cold cream—straight from the fridge. Using a cold bowl and whisk helps too. Beat until stiff peaks form, but stop before it turns buttery. Over-whipped cream becomes grainy and will mess with the cheesecake’s silky feel.
Avoiding Over-Mixing and Sinking Layers
When combining your whipped cream with the cream cheese and Biscoff spread mixture, fold gently. Like, gently. Think of it as tucking clouds into clouds. This keeps the air bubbles intact, giving your cheesecake that feather-light texture.
It’s also wise to chill the crust before pouring in the filling. And if you plan to drizzle melted spread on top, pop the cheesecake in the freezer for 20 minutes first—this prevents the warm topping from sinking into the soft filling.
Freezing Tips for Slicing and Decorating
Here’s a trick: freeze the cake for 15–20 minutes just before serving. It’ll slice cleaner, hold its shape better, and look amazing on a plate. Use a hot knife for extra-smooth cuts—just dip it in hot water, wipe, and slice.
Storing, Serving, and Reusing Leftovers
How Long Can You Refrigerate or Freeze It?
Good news—Lotus Cheesecake Dessert stores like a champ. If you’re prepping ahead, you can keep it in the fridge for up to three days. Just make sure it’s well-covered so it doesn’t pick up fridge odors. For longer storage, the freezer is your best friend. Wrap the whole thing or individual slices tightly, and it’ll stay good for up to a month.
Before serving from frozen, let it thaw overnight in the fridge. Want to enjoy it semi-frozen? Go for it—it’s like eating Biscoff ice cream cake!
Best Ways to Serve for Maximum Visual Appeal
When it comes to serving, neat slices are key. Use a sharp knife dipped in hot water, and wipe clean between cuts for smooth results. Garnish with extra Biscoff crumbs, a drizzle of melted spread, or even fresh berries for a pop of color.
Planning a dessert table? This cheesecake will be the star—no doubt about it.
Lotus Cheesecake Dessert Around the World
The Middle East’s Love Affair with Lotus Desserts
If there’s one place that’s absolutely obsessed with Biscoff, it’s the Middle East. From Lotus milkshakes to Lotus-topped Kunafa, the caramel-cookie flavor has taken over dessert menus across cities like Dubai and Cairo.
So, it’s no surprise that the Lotus Cheesecake Dessert is a fan favorite here too. It hits that perfect balance of rich flavor and creamy texture that people just can’t get enough of.
Creative Global Twists: From Lotus Milkshakes to Tres Leches
But wait—Biscoff creativity doesn’t stop there. Around the world, chefs and home bakers are dreaming up wild spins on this sweet treat. Think Lotus Tres Leches cake, Biscoff brownies, or even cookie butter tiramisu. In cafes from London to Jakarta, the possibilities are endless.
So whether you’re making a classic version or adding your own twist, there’s no doubt that the Lotus Cheesecake Dessert has earned its place in the global dessert hall of fame.
Print
Lotus Cheesecake Dessert
- Total Time: PT4H20M
- Yield: Serves 12 1x
- Diet: Vegetarian
Description
This No-Bake Lotus Cheesecake Dessert is a creamy, indulgent treat made with a buttery Biscoff biscuit crust, a fluffy cream cheese and Lotus spread filling, and a smooth layer of melted cookie butter on top. Perfect for holidays, gatherings, or a cozy night in.
Ingredients
- 200g Lotus Biscoff cookies, crushed
- 80g unsalted butter, melted
- 400g full-fat cream cheese
- 300ml cold double cream
- 200g Lotus Biscoff spread
- 75g powdered sugar
- 150g Lotus Biscoff spread (for topping)
- 50g Lotus Biscoff cookies, crushed (for topping)
Instructions
- Crush the Biscoff cookies and mix with melted butter until well combined.
- Press the mixture into a springform pan and chill in the fridge.
- Whip the double cream until stiff peaks form and set aside.
- In another bowl, beat the cream cheese, 200g Biscoff spread, and powdered sugar until smooth.
- Fold the whipped cream gently into the cream cheese mixture.
- Pour the filling over the crust and smooth the top. Chill for at least 4 hours or overnight.
- Melt the remaining 150g Biscoff spread and pour it over the cheesecake. Smooth it with a spoon.
- Sprinkle the crushed cookies around the edge and chill for an additional hour.
- Slice and serve cold. Enjoy!
Notes
- Use full-fat cream cheese for best results.
- For a firmer crust, bake the base at 160°C for 8 minutes.
- Freeze for 20 minutes before slicing for cleaner cuts.
- Add fresh berries for garnish if desired.
- Prep Time: PT20M
- Cook Time: PT0M
- Category: Dessert
- Method: No-Bake
- Cuisine: International
Nutrition
- Serving Size: 1 slice
- Calories: 445
- Sugar: 12g
- Sodium: 112mg
- Fat: 38g
- Saturated Fat: 19g
- Unsaturated Fat: 8g
- Trans Fat: 0.2g
- Carbohydrates: 20g
- Fiber: 0.1g
- Protein: 5g
- Cholesterol: 76mg
Keywords: Lotus Cheesecake Dessert, Biscoff cheesecake, no-bake dessert, cookie butter cake, speculoos cheesecake, easy cheesecake recipe, caramel cheesecake
FAQs
Can I use peanut butter instead of Lotus Biscoff?
Technically, yes. You can swap in peanut butter, especially if you’re in a pinch. But keep in mind—it won’t taste like a Lotus Cheesecake Dessert. Peanut butter has a completely different flavor profile and is less sweet. If you do try it, consider adding a bit more powdered sugar to balance things out.
Does Lotus Cheesecake Dessert freeze well?
Absolutely! This dessert freezes like a dream. You can freeze the entire cheesecake or individual slices. Just wrap it tightly and thaw it in the fridge overnight before serving. Want to enjoy it partially frozen? It tastes like Biscoff ice cream cake—amazing!
What cream cheese is best for Lotus cheesecake?
Full-fat cream cheese is the only way to go. Brands like Philadelphia (brick-style) or Kiri tubs work well. Avoid spreadable types—they don’t set firmly and could make your cheesecake too soft.
Can I make a vegan or dairy-free version?
Sure, with a few tweaks. Use dairy-free cream cheese and coconut cream in place of heavy cream. Also, double-check your Biscoff spread—some variations may contain dairy.