
Cherry cake design: 15 stunning steps to pure bliss
Introduction
I remember the very first time I tried to make a dessert with fruit. It was a total mess because I did not realize how much juice could leak out and turn everything into a soggy puddle. I felt so defeated but I did not give up on my dream of making something beautiful. Now that I have figured out the tricks I can tell you that a stunning cherry cake design is the best way to turn a simple backyard hangout into a fancy event. There is just something about those bright red berries that makes everyone feel like they are at a professional bakery.
The Inspiration Behind This Cherry Cake Design
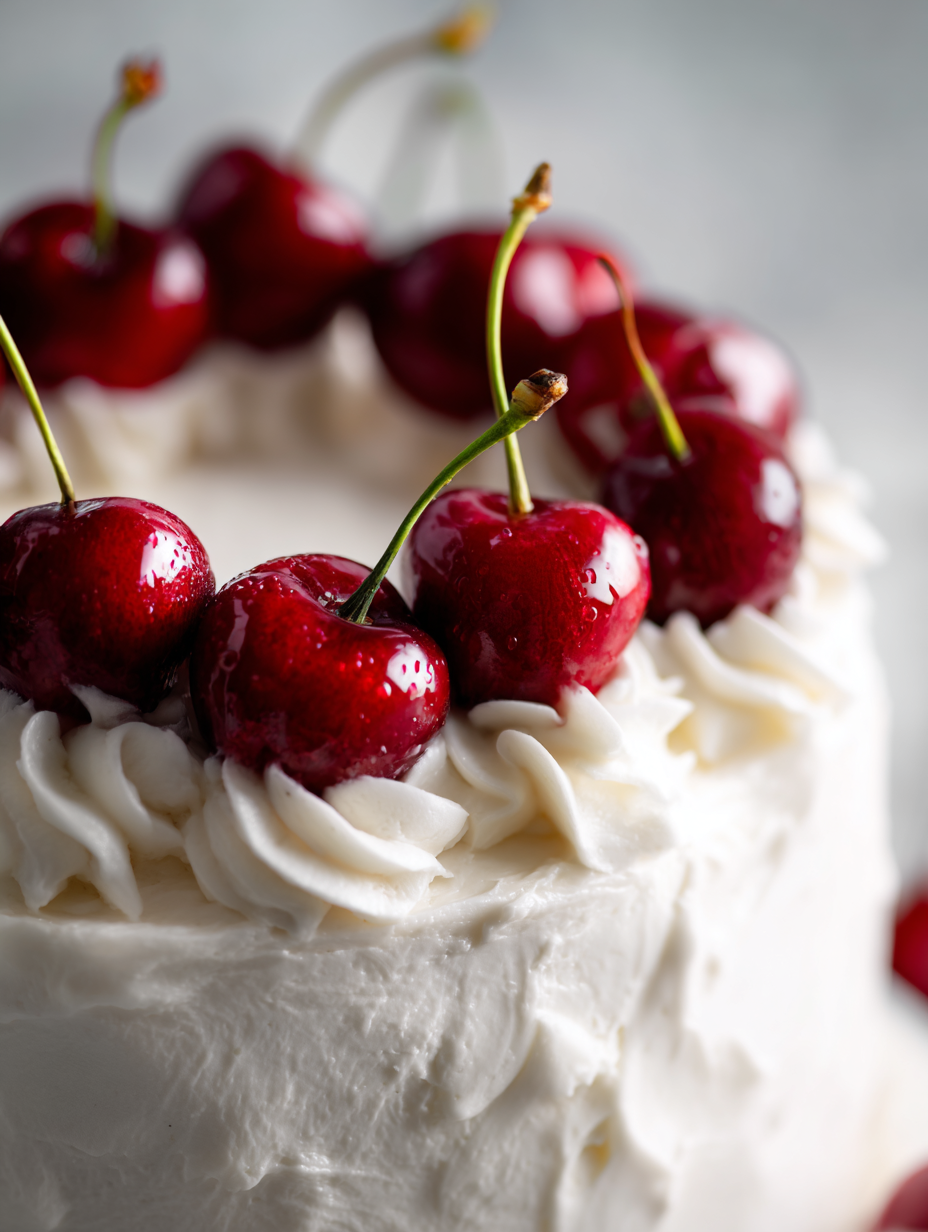
You have probably seen this specific cherry cake design all over your social media feeds lately. It is trending because it has that perfect vintage look that feels both nostalgic and modern at the same time. The deep red color of the cherries creates a massive visual impact against a crisp white frosting. It looks so clean and bold that it grabs your attention immediately. I love how the simple contrast makes the cake look expensive without needing hours of complicated decorating work.
Essential Tools for Your Cherry Cake Design
If you want to make this process easy you should grab a few basic tools. A rotating cake stand is a total game changer because it lets you spin the cake while you hold your hand still. You should also get a bench scraper to help you get those perfectly flat sides that make the cherry cake design look so sharp. I also suggest having a few piping bags and a star tip ready for making the little mounds of frosting that the cherries will sit on. These tools take the stress out of the process especially if you are just starting out.
Selecting High-Quality Ingredients
For the best results you need to start with fresh and simple ingredients. You will need all purpose flour and granulated sugar and unsalted butter and large eggs. Many old recipes call for cherry brandy or maraschino liqueur to get that extra kick but we are going to use tart cherry juice instead. You can also add an extra splash of vanilla extract to the batter to make the flavor really rich. Make sure your butter and eggs are at room temperature so the batter stays smooth and creamy.
Step-by-Step Guide to Your Cherry Cake Design
You should plan for about 40 minutes of prep time and another 30 minutes for the cake to bake in the oven. One thing that used to confuse me was why my cakes always looked lopsided. The secret is to level your cake layers. Once the cakes are cool take a long knife and carefully slice off the rounded top so each layer is perfectly flat before you start the decorating process.
Assembling the Layers
Place your first cake layer on the stand and spread a thin layer of frosting over the top. This acts like a glue to keep everything stable. When you add the next layer make sure it is centered. This foundation is what keeps your cherry cake design from leaning or sliding around while you are trying to make it look pretty. Repeat this until all your layers are stacked up high.
Applying the Final Coating
To get that professional finish you need to start with a crumb coat. This is just a very thin layer of frosting that traps all the loose crumbs. After you apply it put the cake in the fridge for about 20 minutes to let it set. Once it is chilled you can add the final thick layer of frosting and use your bench scraper to smooth it out. This creates the perfect blank canvas for your cherries.
Expert Tips for a Flawless Cherry Cake Design
I have learned the hard way that moisture is the enemy of a white cake. My biggest tip is to take a paper towel and gently pat every single fresh cherry until it is completely dry. If you put them on the cake while they are still damp the red juice will start to bleed into the white frosting. It creates little pink streaks that are hard to fix so keeping them dry is the best way to keep your design looking sharp and clean.
Common Questions About Cherry Cake Design
I get asked all the time if you can use frozen cherries for the decoration. I really recommend sticking to fresh cherries for the top of the cake because frozen ones will thaw and release too much liquid. If you want to know how long the cake stays fresh it usually lasts about three days if you keep it in the refrigerator. Just make sure to take it out about thirty minutes before you serve it so the frosting softens up a bit.
Estimated Nutritional Information
Based on a standard cake cut into 12 even slices here is what you can expect per serving.
- Calories: 450
- Total Fat: 22g
- Carbohydrates: 60g
- Protein: 5g
Cherry cake design: 15 stunning steps to pure bliss
- Total Time: 65 minutes
- Yield: 8 servings 1x
- Diet: Vegetarian
Description
This cherry cake design uses fresh fruit and a soft base. You create a visual pattern with whole cherries on top.
Ingredients
- 2 cups all-purpose flour
- 1 cup granulated sugar
- 1/2 cup unsalted butter
- 2 large eggs
- 1/2 cup whole milk
- 1 teaspoon vanilla extract
- 1 teaspoon baking powder
- 1 cup fresh pitted cherries
- 1/4 cup powdered sugar
Instructions
- Preheat your oven to 350 degrees Fahrenheit.
- Grease a round cake pan.
- Cream the butter and sugar in a bowl.
- Beat in the eggs.
- Add the vanilla extract.
- Mix the flour and baking powder.
- Combine the dry ingredients and milk into the butter mixture.
- Pour the batter into your pan.
- Place cherries on top in a circular design.
- Bake for 35 minutes.
- Cool the cake for 10 minutes and dust with sugar.
Notes
- Use ripe cherries for better color.
- Dry the fruit before placing it on the batter.
- Store the cake in a cool place.
- Prep Time: 20 minutes
- Cook Time: 35 minutes
- Category: Dessert
- Method: Baking
- Cuisine: American
Nutrition
- Calories: 280
Keywords: cherry cake design, fruit cake, summer dessert, baking recipe