
Peach Pie Filling
Table of Contents
There’s something downright magical about the sweet, sticky goodness of peach pie filling. Whether it’s bubbling under a golden crust or spooned over a scoop of vanilla ice cream, it brings that perfect blend of summer warmth and cozy comfort. But hey, there’s more to it than just tossing fruit and sugar into a pan!
In this guide, we’re diving deep into everything you need to know about making your very own homemade peach pie filling — from picking the juiciest peaches to storing it like a pro. We’ll tackle the best ingredients, step-by-step cooking tips, and even some clever uses for leftovers (spoiler: you’ll want to make extra). Oh, and we’re not just about the basics. We’ve got storage hacks, nutritional facts, and answers to questions you didn’t even know you had.
Ready to stir things up in the kitchen? Let’s get started.
Choosing the Right Peaches for Pie Filling
Fresh vs. Canned vs. Frozen Peaches — What’s Best?
When it comes to peach pie filling, the kind of peaches you use can make or break the whole dessert. While it might be tempting to grab a can and call it a day, nothing beats the flavor of fresh, ripe peaches. They bring a natural sweetness, tender texture, and a bit of tartness that balances everything out.
That said, canned or frozen peaches do have their place — especially when fresh ones are out of season. Canned peaches are convenient, but they can be overly sweet and a bit mushy. If you’re using them, go for the ones packed in juice, not syrup. Frozen peaches? They’re a solid second choice. Just thaw and drain them well before using, or your filling could turn watery.
How to Peel, Pit, and Slice Peaches Properly
Peeling peaches doesn’t have to be a sticky mess. Here’s a trick: blanch them in hot water for 30 seconds, then dunk them in ice water. The skins will slip right off! After that, slice around the pit, twist gently, and pull the halves apart. Slice them evenly so they cook at the same rate — nobody wants a filling with mushy bits and firm chunks mixed in.
Choosing the right peaches is the first big step toward homemade peach pie filling that tastes like it came straight outta grandma’s kitchen.
Core Ingredients of a Great Peach Pie Filling
Must-Have Ingredients (Sugar, Cinnamon, Cornstarch, etc.)
Alright, now that we’ve got the peaches sorted, let’s talk ingredients. The backbone of any good peach pie filling includes just a handful of pantry staples: granulated sugar, light brown sugar, cornstarch, and ground cinnamon. The sugars add that rich sweetness and golden color, while the cornstarch thickens the filling to that perfect, jammy consistency.
Cinnamon? Oh yes — it brings a warm, cozy depth that makes the peaches sing. A pinch of salt helps all those flavors shine. And don’t forget a bit of butter to give the filling a silky finish!
Flavor Boosters: Vanilla, Nutmeg, Lemon Juice
Want to take your filling from good to unforgettable? Add a splash of pure vanilla extract — it smooths out the sweetness with a hint of floral magic. A touch of nutmeg adds a little edge without overpowering the peaches, and lemon juice is your best friend here. It brightens the whole mixture and keeps the peaches from turning brown too fast.
With these ingredients on hand, you’ll be all set to whip up a homemade peach pie filling that’s sweet, spiced, and spoon-lickin’ good.
Step-by-Step Guide to Making Peach Pie Filling
Cooking Peach Pie Filling on the Stove
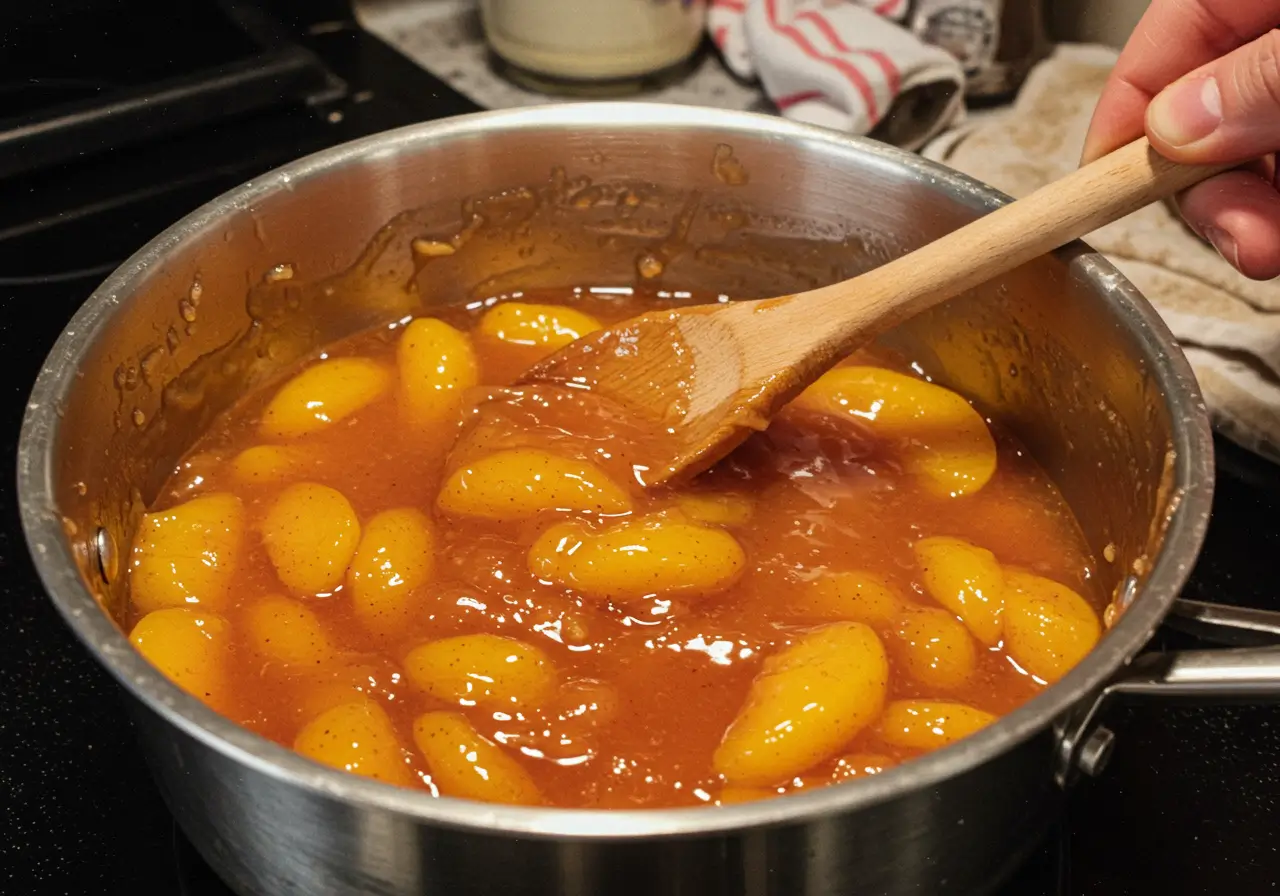
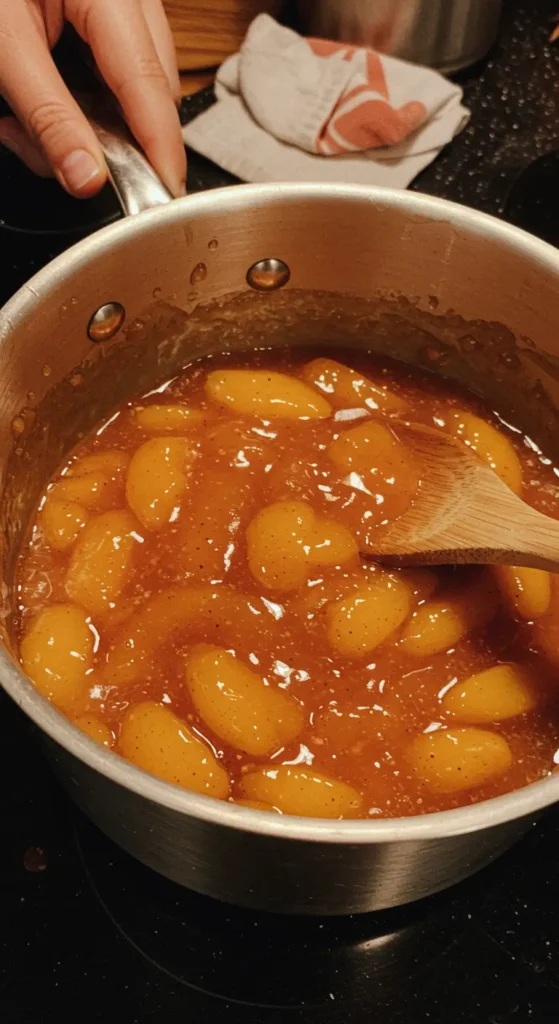
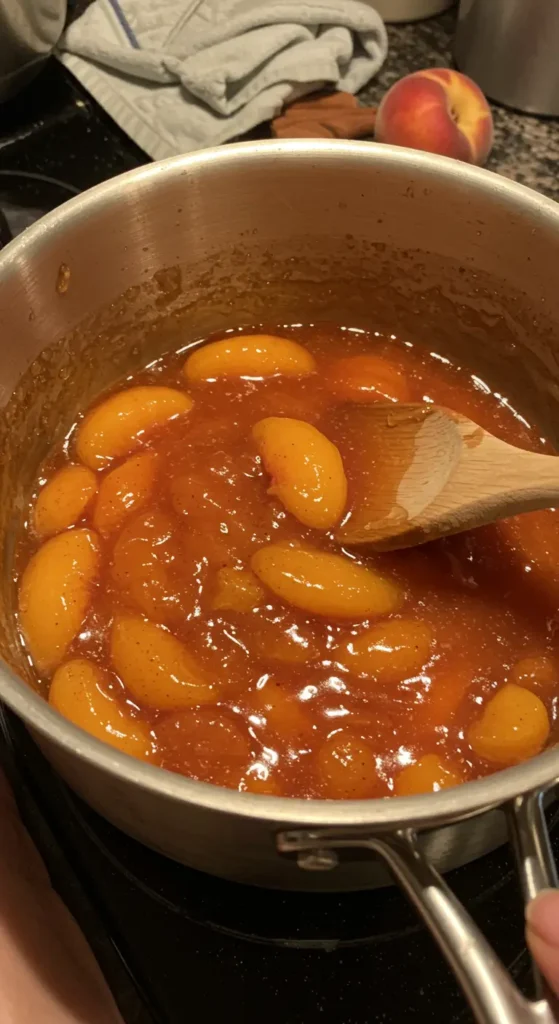
Alright, apron on? Let’s get cookin’! Making peach pie filling at home is simpler than it sounds. Start by melting a tablespoon of butter in a medium saucepan over medium heat. Once it’s melted and bubbly, stir in your vanilla extract and cornstarch — whisk until smooth.
Next, toss in your granulated sugar, brown sugar, cinnamon, and salt. Once everything’s combined, add those beautiful sliced peaches. Gently stir the mixture so the fruit is well-coated in that sweet-spiced base.
Let it simmer for about 10–12 minutes, stirring frequently. You’ll notice the peaches start to soften and release their juices, while the filling thickens into that glossy, golden goodness we all love. Don’t rush this step — it takes time for the flavors to marry and for the texture to get just right.
Common Mistakes and How to Avoid Them
Now, let’s keep things peachy. One of the most common mistakes? Overcooking. If the peaches break down too much, your filling will be more like jam. And while that’s tasty, it’s not quite what we’re after here.
Also, don’t skip the cornstarch. Without it, your filling may end up soupy and sad — definitely not pie-ready. Lastly, keep stirring. Letting the mixture sit too long without moving it around can lead to scorching or uneven thickening.
This step-by-step method will give you a homemade peach pie filling that’s thick, sweet, and ready to pour into your favorite pie crust.
How to Use Peach Pie Filling
Best Pie Crusts to Pair With
Now that you’ve got your peach pie filling lookin’ like a golden dream, let’s talk crusts. You can never go wrong with a buttery, flaky homemade crust. It soaks up the juices without getting soggy — and the flavor? Pure bliss.
Short on time? No judgment — a quality store-bought crust will still make magic happen. Just make sure to blind-bake the bottom if you’re worried about it turning too soft.
Want a rustic twist? Try a crumble topping made with oats, brown sugar, and butter. It adds a sweet crunch that pairs perfectly with the soft peaches underneath.
Creative Ways to Use Leftover Filling
Don’t toss that extra filling! It’s a gift that keeps on giving. Spoon it over pancakes, swirl it into yogurt, or layer it into parfaits with whipped cream and granola.
Hosting brunch? Warm some up and serve it alongside French toast or waffles. Heck, we even love sneaking a spoonful straight from the jar.
For more delicious ideas, check out our dessert recipe collection on Smaczne Gotowanie.
How to Store, Freeze, and Preserve Peach Pie Filling
Refrigerator Storage Tips
So, you’ve whipped up a fresh batch of peach pie filling — now what? If you’re not using it right away, just let it cool completely first. Then, scoop it into an airtight container or mason jar and pop it in the fridge. It’ll stay tasty for up to 5 days.
Make sure to press a piece of plastic wrap right on top of the filling before sealing the lid. This helps prevent that sticky skin from forming on top. And hey, label it with the date so you don’t forget when you made it!
Can You Freeze It? How to Freeze It Right
Absolutely, peach pie filling freezes like a dream. Once it cools down, spoon it into freezer-safe bags or containers. Be sure to leave a little space at the top — it’ll expand as it freezes.
Lay the bags flat so they freeze quickly and stack easily. When you’re ready to use it, thaw it in the fridge overnight or warm it gently on the stove.
Whether you’re prepping for holidays or just want a little taste of summer in winter, freezing is the way to go.
Canning Peach Pie Filling Safely
USDA-Approved Canning Methods
Thinking long-term? Canning your peach pie filling lets you enjoy the taste of ripe peaches all year long. But here’s the deal — safety first! According to USDA guidelines, only use Clear Jel, not cornstarch, when canning. Why? Because cornstarch can break down and create an unsafe product over time.
Start by sterilizing your jars, lids, and rings. Fill each jar with hot filling, leaving about 1 inch of headspace. Wipe the rims clean, seal, and process the jars in a boiling water bath — usually about 30 minutes, depending on your altitude.
It’s a little extra work, sure, but the reward is sweet. Homemade, shelf-stable peach pie filling at your fingertips? Yes, please!
Using Clear Jel vs. Cornstarch for Canning Safety
Let’s clear this up: Clear Jel is a modified starch designed to hold up to high heat and storage. It keeps the texture smooth and safe for long-term shelf life. Cornstarch, on the other hand, doesn’t hold up and can create air pockets — a big no-no when canning.
So, if you’re preserving for later, reach for Clear Jel and follow proper guidelines. That way, your pies will be delicious and safe every time.
Print
Peach Pie Filling
- Total Time: PT40M
- Yield: Serves 8
- Diet: Gluten Free
Description
This homemade peach pie filling is a sweet, glossy blend of fresh peaches, brown sugar, cinnamon, and vanilla, made from scratch for a natural and flavorful dessert base. It’s perfect for pies, parfaits, and more, with a smooth texture and comforting taste.
Ingredients
- 2 pounds fresh peaches (about 6), peeled and sliced
- 1/2 cup granulated sugar
- 1/2 cup packed light brown sugar
- 1/4 cup cornstarch
- 1 teaspoon ground cinnamon
- 1/8 teaspoon salt
- 1 tablespoon butter
- 2 teaspoons pure vanilla extract
Instructions
- In a medium saucepan over medium heat, melt the butter.
- Add the vanilla extract and cornstarch. Whisk until smooth and combined.
- Stir in the granulated sugar, brown sugar, cinnamon, and salt.
- Fold in the sliced peaches and stir until coated.
- Cook for 10–12 minutes, stirring frequently, until the peaches soften and the mixture thickens.
- Remove from heat. Let cool slightly before using or storing in the fridge or freezer.
Notes
- You can use frozen peaches if fresh ones are unavailable. Thaw and drain them first.
- Swap butter with vegan butter for a dairy-free version.
- Use Clear Jel instead of cornstarch if canning the filling.
- Prep Time: PT20M
- Cook Time: PT20M
- Category: Dessert
- Method: Stovetop
- Cuisine: American
Nutrition
- Serving Size: 1/8 of recipe
- Calories: 195
- Sugar: 36g
- Sodium: 55mg
- Fat: 2g
- Saturated Fat: 1g
- Unsaturated Fat: 1g
- Trans Fat: 0g
- Carbohydrates: 45g
- Fiber: 2g
- Protein: 1g
- Cholesterol: 5mg
Keywords: peach pie filling, homemade peach pie, fresh peach dessert, easy peach filling recipe, gluten free pie filling, cooked peach pie, fruit pie filling
Common Questions About Peach Pie Filling
Can I Make It Sugar-Free?
You sure can! If you’re watching your sugar intake, peach pie filling can still be sweet and satisfying. Just swap the sugar for a low-calorie sweetener like Stevia, monk fruit, or erythritol. But don’t go overboard — some of these can be sweeter than sugar, so use the conversion ratios on the label.
Keep in mind that sugar also affects texture and moisture, so your filling might not thicken the same way. If it looks too thin, add a bit more cornstarch or Clear Jel to help it along.
How Do I Thicken It Without Cornstarch?
Cornstarch isn’t the only game in town. If you’re out — or avoiding it — there are other ways to get your peach pie filling nice and thick. Try arrowroot powder, tapioca starch, or Clear Jel (especially if you’re canning it).
Each thickener works a bit differently, so start small and adjust as you go. And don’t forget to simmer gently — that helps the thickener activate and blend with the fruit.
Got more questions about your filling adventures? You’re not alone. Folks often ask if they need to peel the peaches (you don’t have to, but it’s nicer), or if white peaches work (they do — they’re just a bit less tart).
Nutritional Info and Health Considerations
Calories, Sugar, and Serving Size
Let’s break it down — most peach pie filling recipes yield around 8 servings, with each one coming in at about 175–200 calories. Most of those calories come from the sugars and peaches themselves, so if you’re using less sugar or a substitute, the calorie count drops.
Even though it’s sweet, homemade filling usually has fewer additives and way less sugar than the canned stuff you’ll find at the store. So yes, it’s dessert, but at least you know what’s in it!
Gluten-Free and Vegan Options
Great news — this filling is naturally gluten-free and vegan! Just double-check your thickener. Cornstarch and arrowroot are usually safe bets, but always read the label to be sure it’s not cross-contaminated if you’re cooking for someone with celiac.
Butter can be swapped for a plant-based version if needed. And since it’s all about fruit, spice, and sweetness, the flavor still shines through.