
Moist and Fluffy Red Velvet Cake
Table of Contents
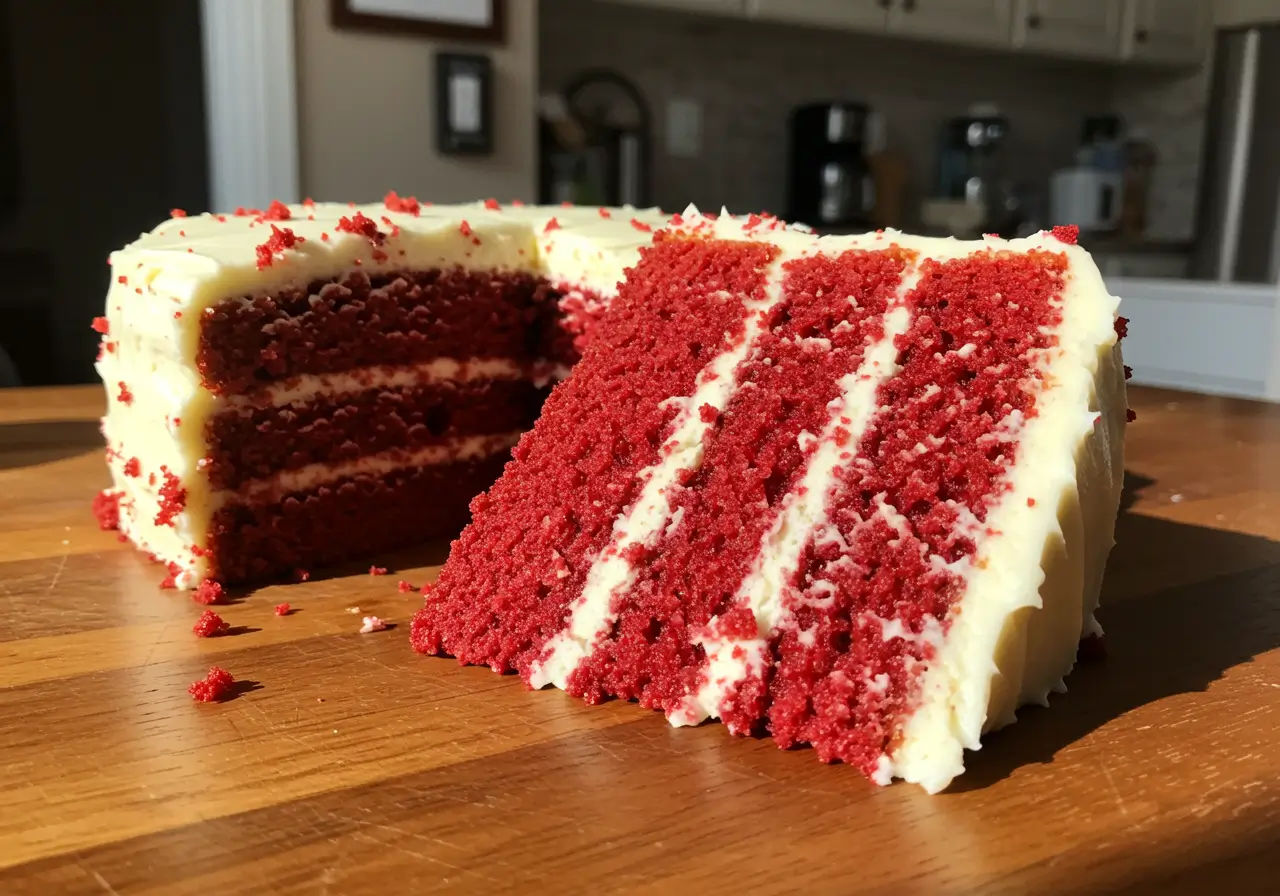
Who doesn’t love a slice of moist and fluffy red velvet cake? Whether it’s for a birthday, holiday, or just because—it’s a classic dessert that never goes out of style. But here’s the thing: not every red velvet cake hits the sweet spot between softness and structure. Some come out dry, while others lack that velvety richness we all crave. So what’s the secret?
In this guide, we’ll break down exactly how to make the best moist and fluffy red velvet cake from scratch. We’ll cover everything from the science behind the ingredients to expert baking tips, troubleshooting tricks, and even frosting ideas that’ll make your cake the star of any dessert table.
Let’s jump in!
The Science Behind a Moist and Fluffy Texture
The Role of Buttermilk, Vinegar, and Oil
Want a cake that’s light as air yet moist like a dream? It all starts with the right ingredients. Each one plays a unique role in creating the moist and fluffy red velvet cake we’re after.
Take buttermilk, for example. It’s not just there for flavor—it adds acidity, which reacts with baking soda to create lift. That reaction gives the batter tiny bubbles, making the final cake tender and soft.
Vinegar might seem like a weird choice in a dessert, but trust us—it’s a red velvet staple. Combined with cocoa powder, it enhances the cake’s subtle tang and gives it that unique flavor. Plus, it supports the chemical reaction that makes the cake rise just right.
Now, here’s a big one—oil. Unlike butter, oil remains liquid at room temperature, keeping your cake moist even after a day or two. That’s why oil is your best friend when you want to avoid a dry, crumbly texture.
Avoiding Dryness: Common Mistakes to Dodge
Baking is a bit like magic, but it’s also easy to mess up. Overmixing? That can toughen your cake by building too much gluten. Using cold ingredients? That might mess with your texture. And skipping the sifting step? Big no-no—it can leave your batter lumpy.
To keep your moist and fluffy red velvet cake in top shape, mix just until combined, bring everything to room temp before starting, and never eyeball your measurements. These little steps make a huge difference!
Ingredient Breakdown and Quality Tips
Choosing the Right Flour, Cocoa, and Butter
Not all ingredients are created equal. And when it comes to baking the perfect red velvet cake, choosing wisely makes all the difference.
Let’s start with flour. You want to use all-purpose flour, not cake flour, unless a recipe specifically says so. All-purpose gives just the right amount of structure without making the cake dense.
Next up—cocoa powder. For that true red velvet flavor, use unsweetened natural cocoa powder. It’s slightly acidic and reacts beautifully with vinegar and buttermilk to create that reddish hue and soft crumb. Avoid Dutch-processed cocoa—it’s too neutral and can throw off your results.
What about butter? Here’s the deal—unsalted butter gives you more control over your recipe’s salt content. But since red velvet also uses vegetable oil for moisture, butter mainly adds flavor and richness. So, make sure it’s softened, not melted or cold.
Importance of Fresh Ingredients for Moisture
Freshness matters more than you think. Baking powder and baking soda lose their punch after a while, and expired leaveners can leave you with a sad, flat cake. Always check the date before baking!
And don’t skimp on vanilla extract. A good-quality vanilla can bring your moist and fluffy red velvet cake to life with warm, rich notes that round out the flavor.
In short—invest in quality, fresh ingredients, and your cake will taste like it came straight from a bakery (only better, because you made it yourself!).
Step-by-Step Baking Instructions
Preparation: Mixing the Wet and Dry Ingredients
Okay, time to roll up those sleeves! Making a moist and fluffy red velvet cake isn’t rocket science—but it does require some attention to detail.
Start by preheating your oven to 320°F (160°C) with the fan setting on. Grease and line two 8-inch cake tins. This step ensures your cakes don’t stick and bake evenly.
Next, sift together your dry ingredients—flour, cornstarch, baking soda, baking powder, cocoa powder, and salt. This helps keep your batter lump-free and oh-so-smooth.
In a separate bowl, cream your butter, sugar, and oil until the mixture turns pale and fluffy. Don’t rush it—this is where air gets worked in, giving your cake that light texture.
Now, beat in the eggs, one at a time. Follow this with vanilla extract, vinegar, and red food coloring. Things will look vibrant and slightly strange—that’s normal!
Finally, fold the dry ingredients into the wet in three parts, alternating with buttermilk. Always end with dry ingredients and don’t overmix. Doing this by hand helps you avoid a dense cake.
Baking Techniques to Keep Your Cake Fluffy
Divide the batter evenly between the two pans. Tap them on the counter to release air bubbles. Bake for about 30 minutes or until a toothpick poked in the middle comes out clean.
Let the cakes cool in the pans for 15–20 minutes before turning them onto a wire rack. It’s tempting to rush here, but don’t—cooling keeps your cakes from falling apart later.
Want more rich dessert ideas? You might also enjoy this creamy Strawberry Cheesecake recipe.
Frosting and Decorating the Perfect Red Velvet Cake
Cream Cheese Frosting Tips
Let’s talk frosting—because no moist and fluffy red velvet cake is complete without a thick swirl of cream cheese frosting. You want it smooth, not soupy; tangy, not too sweet.
Start with softened cream cheese and unsalted butter. Beat them until light and fluffy. Then slowly add powdered sugar and a touch of vanilla extract. Want that bakery-level finish? Add a pinch of salt to balance the sweetness.
Pro tip: Chill your frosting for 10–15 minutes before using. It’ll spread easier and stay put.
Piping, Layering, and Decorating Ideas
Ready to assemble? Place one cooled cake layer on your plate or stand. Add a thick layer of frosting, then gently set the second cake layer on top. Don’t press too hard—you want to keep things light.
Spread a thin crumb coat all over the cake, chill it, then add a final layer. You can stop here, or go wild with piping—rosettes, swirls, you name it!
For extra flair, top with red velvet crumbs, berries, or even white chocolate curls. Make it yours!
Storage and Serving Recommendations
How to Store Without Losing Moisture
So, you’ve baked a moist and fluffy red velvet cake and somehow managed not to eat it all in one sitting—congrats! Now, let’s make sure it stays fresh.
First things first—never store your cake uncovered. Air is the enemy of moisture. Wrap it tightly in plastic wrap or place it in an airtight container. If it’s already frosted, refrigerate it, especially if you used cream cheese frosting.
Want to enjoy it later? Let the cake come back to room temperature before serving. Cold cake just doesn’t hit the same way.
Serving Suggestions for the Best Experience
When it’s time to serve, slice using a warm, sharp knife for cleaner cuts. Pair your red velvet cake with a glass of milk, a cup of coffee, or even fresh berries on the side.
Serving for a special occasion? Add a sprinkle of powdered sugar or a drizzle of melted white chocolate for that “wow” factor.
Expert Tips and Troubleshooting
Why Did My Cake Turn Out Dense or Dry?
It happens—don’t worry! Even the best bakers have their off days. If your moist and fluffy red velvet cake turned out dense, one culprit might be overmixing. That builds too much gluten, making your cake chewy, not airy.
Another common issue is using cold ingredients. They don’t blend as smoothly, which messes with the cake’s texture. Always use room-temperature eggs, buttermilk, and butter.
And let’s not forget oven temperature—too hot, and the cake bakes unevenly; too cool, and it may not rise properly. An oven thermometer can help you stay on track.
Quick Fixes for Common Mistakes
If your cake comes out a little dry, don’t panic. A quick brush of simple syrup over the layers before frosting can restore some of that moisture.
Uneven layers? Just trim them with a serrated knife before stacking. And if your frosting is too runny, pop it in the fridge for 15–20 minutes. It’ll firm up in no time.
Baking is part science, part love—and mistakes are how we learn. So don’t stress. You’ve got this!
Print
Moist and Fluffy Red Velvet Cake
- Total Time: PT40M
- Yield: Serves 12 1x
- Diet: Vegetarian
Description
This moist and fluffy red velvet cake recipe is a bakery-quality classic made simple. With a soft, tender crumb, light cocoa flavor, and luscious cream cheese frosting, it’s the perfect treat for any occasion. Rich in flavor and vibrant in color, it’s sure to be a showstopper at your next gathering.
Ingredients
- 2¼ cups (275g) all-purpose flour
- 3 tbsp (18g) cornstarch
- 3 tbsp (14g) unsweetened natural cocoa powder
- ½ tsp baking soda
- 1 tsp baking powder
- ½ tsp salt
- 6 tbsp (86g) unsalted butter, room temperature
- ¾ cup (141g) vegetable oil
- 1¾ cups (344g) granulated sugar
- 3 large eggs, room temperature
- 1 tbsp (12g) vanilla extract
- 1½ tsp white vinegar
- 3½ tbsp (38g) red liquid food coloring
- ¾ cup (158g) buttermilk, room temperature
- 1 batch cream cheese frosting
Instructions
- Preheat oven to 160°C (320°F) with fan setting. Grease and line two 8-inch cake tins.
- Sift together flour, cornstarch, cocoa powder, baking soda, baking powder, and salt. Set aside.
- In a large bowl, cream butter, oil, and sugar until light and fluffy.
- Add eggs one at a time, mixing well after each. Stir in vanilla extract, vinegar, and red food coloring.
- Fold in the dry ingredients in three parts, alternating with buttermilk. Mix just until combined.
- Divide batter between cake tins. Tap lightly to release air bubbles.
- Bake for 30 minutes, or until a toothpick comes out clean.
- Cool in tins for 15–20 minutes, then transfer to a wire rack to cool fully.
- Frost with cream cheese frosting. Decorate as desired and chill before serving.
Notes
- Substitute buttermilk with ¾ cup milk + 1 tbsp vinegar or lemon juice.
- Use cake flour (293g) in place of flour and cornstarch for a finer crumb.
- Chill frosting before use to make decorating easier.
- Prep Time: PT10M
- Cook Time: PT30M
- Category: Dessert
- Method: Baking
- Cuisine: American
Nutrition
- Serving Size: 1 slice
- Calories: 429
- Sugar: 32g
- Sodium: 217mg
- Fat: 22g
- Saturated Fat: 7g
- Unsaturated Fat: 14g
- Trans Fat: 0.3g
- Carbohydrates: 53g
- Fiber: 1g
- Protein: 5g
- Cholesterol: 64mg
Keywords: moist and fluffy red velvet cake, red velvet dessert, soft red velvet cake, cream cheese frosting cake, fluffy velvet cake, easy red velvet cake, homemade red velvet cake
FAQs – Moist and Fluffy Red Velvet Cake
Can I use cake flour instead of all-purpose flour?
Yes, you can! Cake flour gives an even lighter crumb, which can boost the “fluffy” factor in your moist and fluffy red velvet cake. However, all-purpose flour works just fine too—just sift it well and don’t overmix.
What makes a red velvet cake moist and fluffy?
Great question. It’s all about balance. Moisture comes from oil, buttermilk, and eggs. Fluffiness? That’s thanks to leaveners like baking soda, and the creaming process that traps air. Plus, folding instead of beating the final batter helps keep it airy.
How long does red velvet cake stay fresh?
If stored right, your cake can stay soft and tasty for up to 4–5 days. Just wrap it well or use a cake container. And remember—chill it only if it’s frosted with cream cheese.
Can I make it without food coloring?
Absolutely! Traditional red velvet relied on natural reactions between cocoa and vinegar. Without coloring, the cake will have a reddish-brown tone. It’s still delicious and keeps all the charm of a true red velvet.
Nutritional Info and Substitutes
Nutritional Breakdown (Estimates)
Each slice of moist and fluffy red velvet cake (based on a 12-slice cake) has roughly:
- Calories: 430
- Carbs: 53g
- Fat: 22g
- Sugar: 32g
- Protein: 5g
Of course, values may vary depending on your exact ingredients and portion sizes.
Substitutes for Common Ingredients
No buttermilk on hand? Mix ¾ cup milk with 1 tbsp vinegar or lemon juice. Let it sit for 5–10 minutes—it works like a charm.
Need an egg-free version? Try ¼ cup of unsweetened applesauce or yogurt per egg. You’ll still get a moist and fluffy texture without the eggs.
Watching your sugar intake? Swap half the sugar with coconut sugar or erythritol. Just note, it may change the flavor slightly.